
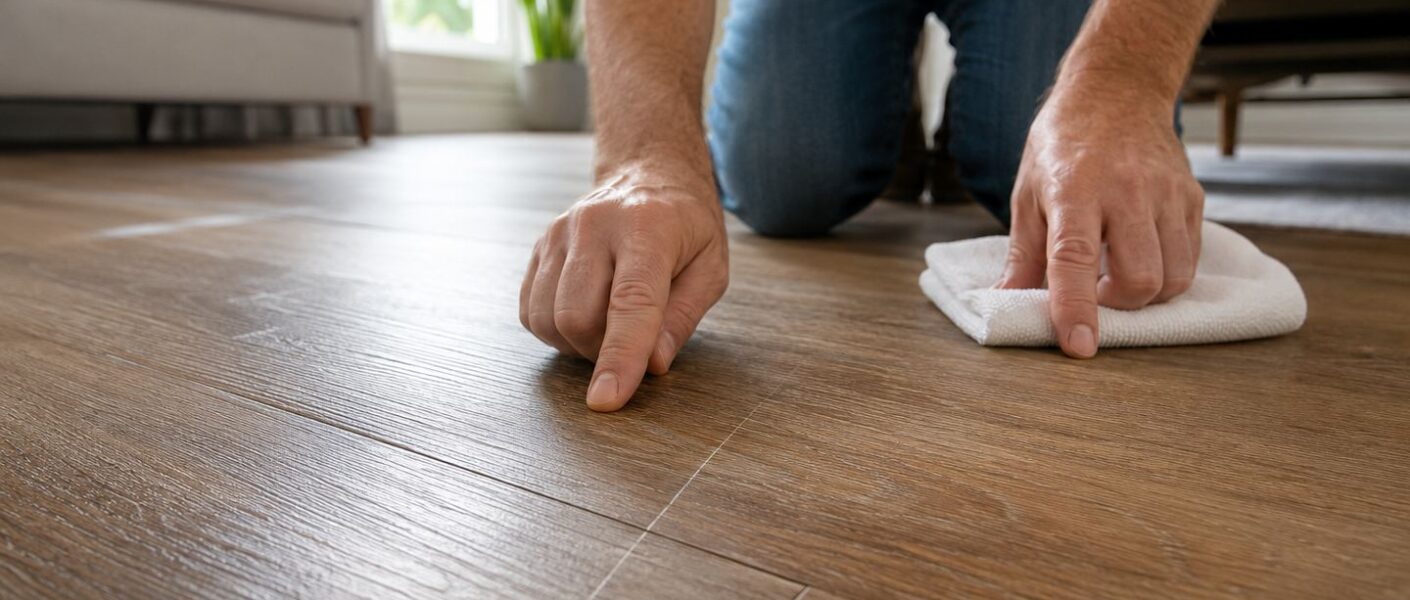
A scratch in vinyl plank flooring can look permanent, but many marks are only surface damage. The safest way to repair scratches in vinyl plank flooring is to identify whether the mark is a scuff, a shallow wear-layer scratch, or a cut through the printed design.
Scuffs can usually be cleaned away. Light scratches may improve with a manufacturer-approved restoration product. Small gouges can sometimes be filled cosmetically. However, damage that exposes the printed film or core cannot be fully restored by sanding or polishing. Karndean, for example, recommends a surface restoration process for light scratches but advises plank replacement when deep damage remains.
Quick Facts: Best Repair Method by Scratch Type
| Damage type | How to identify it | Best repair method | Likely result |
|---|---|---|---|
| Rubber or furniture scuff | No groove catches your fingernail | Manufacturer-approved cleaner or gentle scuff removal | Usually removable |
| Fine surface scratch | Visible at an angle but barely catches a nail | Approved surface refresher or finish-restoration system | Often becomes much less visible |
| Narrow scratch through top coating | Fingernail catches slightly | Color-matched repair product approved for that floor | Cosmetic improvement |
| Small gouge or cut | Material is missing or the printed layer is exposed | Approved vinyl repair compound | Conceals damage but does not rebuild the original wear layer |
| Deep gouge, lifted edge, or cracked locking joint | Core or click system is damaged | Professional plank repair or replacement | Spot filling is not a durable structural fix |
KEY TAKEAWAY The important point is simple: cleaning removes transferred material, restoration products improve the finish, and fillers only disguise missing material. These methods are not interchangeable.
Why Vinyl Plank Scratches Cannot Be Sanded Like Hardwood
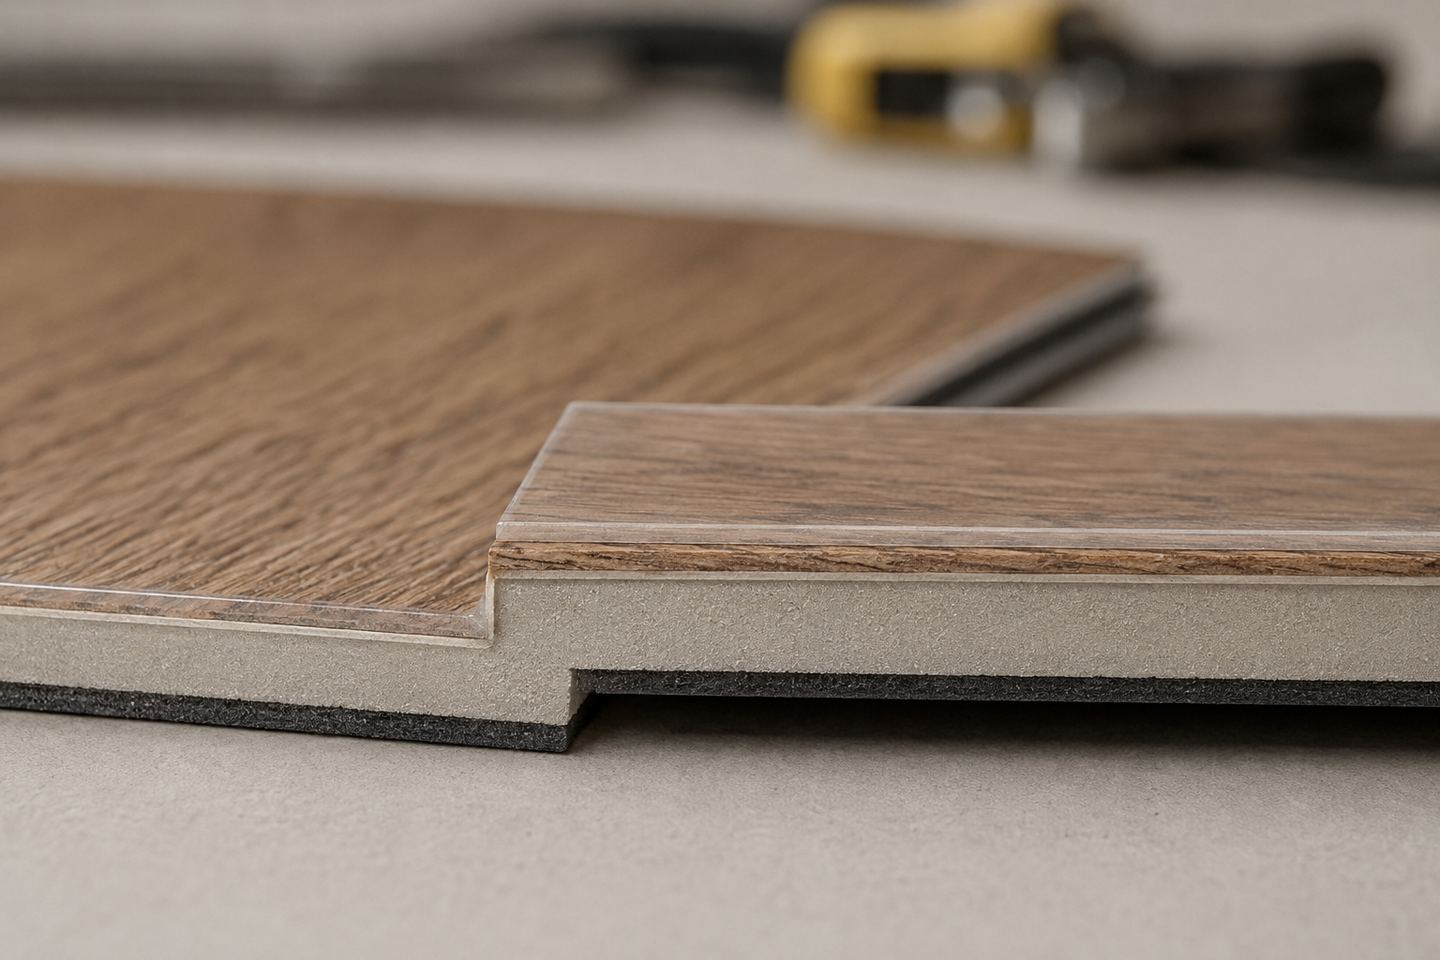
Luxury vinyl plank is a layered resilient floor. A typical plank includes a backing, a core, a printed decorative film, a transparent wear layer, and a factory-applied surface coating. The wood appearance comes from the printed film, not from solid wood fibers.
Sanding a scratch can remove the embossed texture or clear wear layer. Deeper sanding may reach the printed image and create a pale or blurred patch that cannot be refinished.
This is where many DIY repairs go wrong. A homeowner sees a wood-grain pattern and treats the floor like hardwood. Vinyl has no Janka hardness rating and no refinishing allowance.
Wear Layer Thickness Matters, but Not in the Way Most People Think
Residential LVP commonly uses wear layers measured in mils. One mil equals 0.001 inch. A 20 mil wear layer is approximately 0.5 mm thick.
ASTM-related commercial specifications commonly identify 20 mil, or about 0.5 mm, as a commercial wear-layer threshold for printed-film solid vinyl tile.
A thicker wear layer can improve resistance to long-term abrasion. It does not mean a deep scratch can be sanded away. Even a 20 or 22 mil surface remains thin compared with a refinishable hardwood wear surface.
Modern aluminum-oxide and polyurethane coatings can also improve scratch resistance. Mannington currently uses an aluminum-oxide performance coating on its ADURA luxury vinyl products.
First, Decide Whether It Is a Scratch or a Scuff
Clean the area before attempting a repair. Dirt inside a mark can make it appear deeper than it is.
Use a microfiber cloth and the cleaner approved for your flooring brand. Shaw recommends a neutral-pH cleaner and regular removal of soil that can contribute to scratching.
After cleaning, inspect the mark under light from several angles.
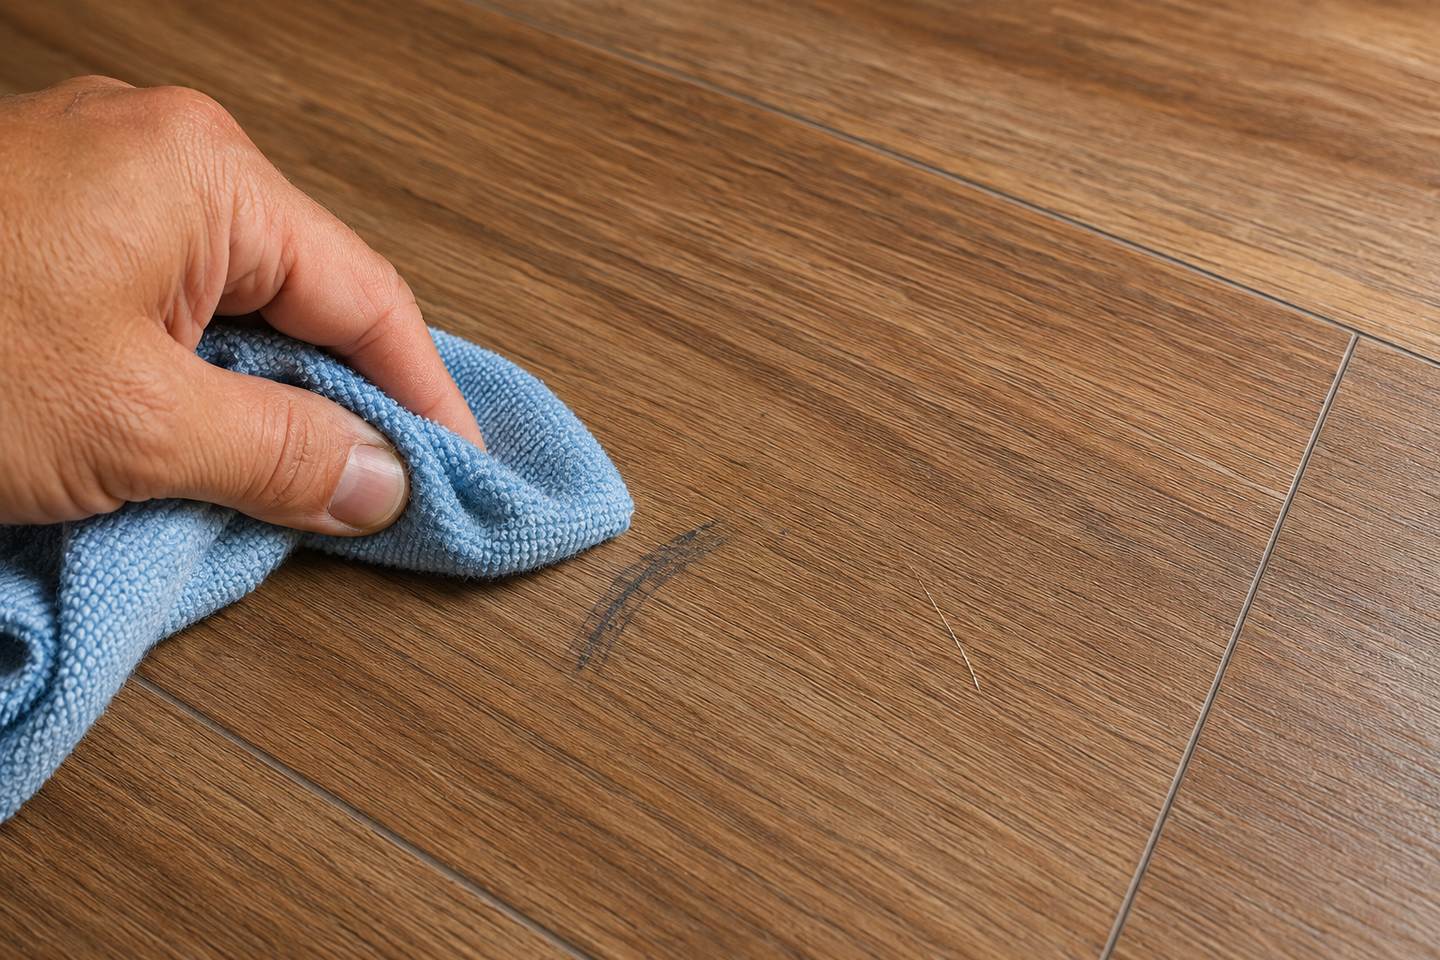
It Is Probably a Scuff If:
- The mark changes when rubbed with a damp microfiber cloth.
- Your fingernail does not catch in it.
- The mark looks like rubber, plastic, paint, or furniture transfer.
- The original grain and color remain visible underneath.
Karndean recommends buffing some scuff marks with a clean tennis ball. Other manufacturers permit specific solvents for certain marks. Mannington, for example, lists isopropyl alcohol among its options for scuffs, marks, and scratches on selected ADURA products. Always confirm the exact care guide before using a solvent.
It Is a True Scratch If:
- Your fingernail catches in a groove.
- The mark stays visible after cleaning.
- The surface sheen changes along a narrow line.
- A lighter or darker layer is visible beneath the finish.
It Is a Gouge If:
- Vinyl material is missing.
- The printed wood pattern is cut.
- The edge of the damage feels sharp or raised.
- The rigid core or backing is visible.
How to Repair Light Scratches in Vinyl Plank Flooring
Light scratches affect the factory coating or upper wear layer without cutting through the printed film.
Step 1: Find the Exact Flooring Brand and Product
Check leftover cartons, invoices, warranty documents, or spare planks. Repair chemistry varies between polyurethane, UV-cured, ceramic-bead, and aluminum-oxide finishes.
Do not assume a product labeled for “vinyl floors” is approved for every LVP surface.
Step 2: Clean the Entire Plank
Vacuum loose grit using a hard-floor setting. Then clean the plank with the approved neutral cleaner.
Cleaning only the scratch can leave a cleaner or shinier halo around the repair.
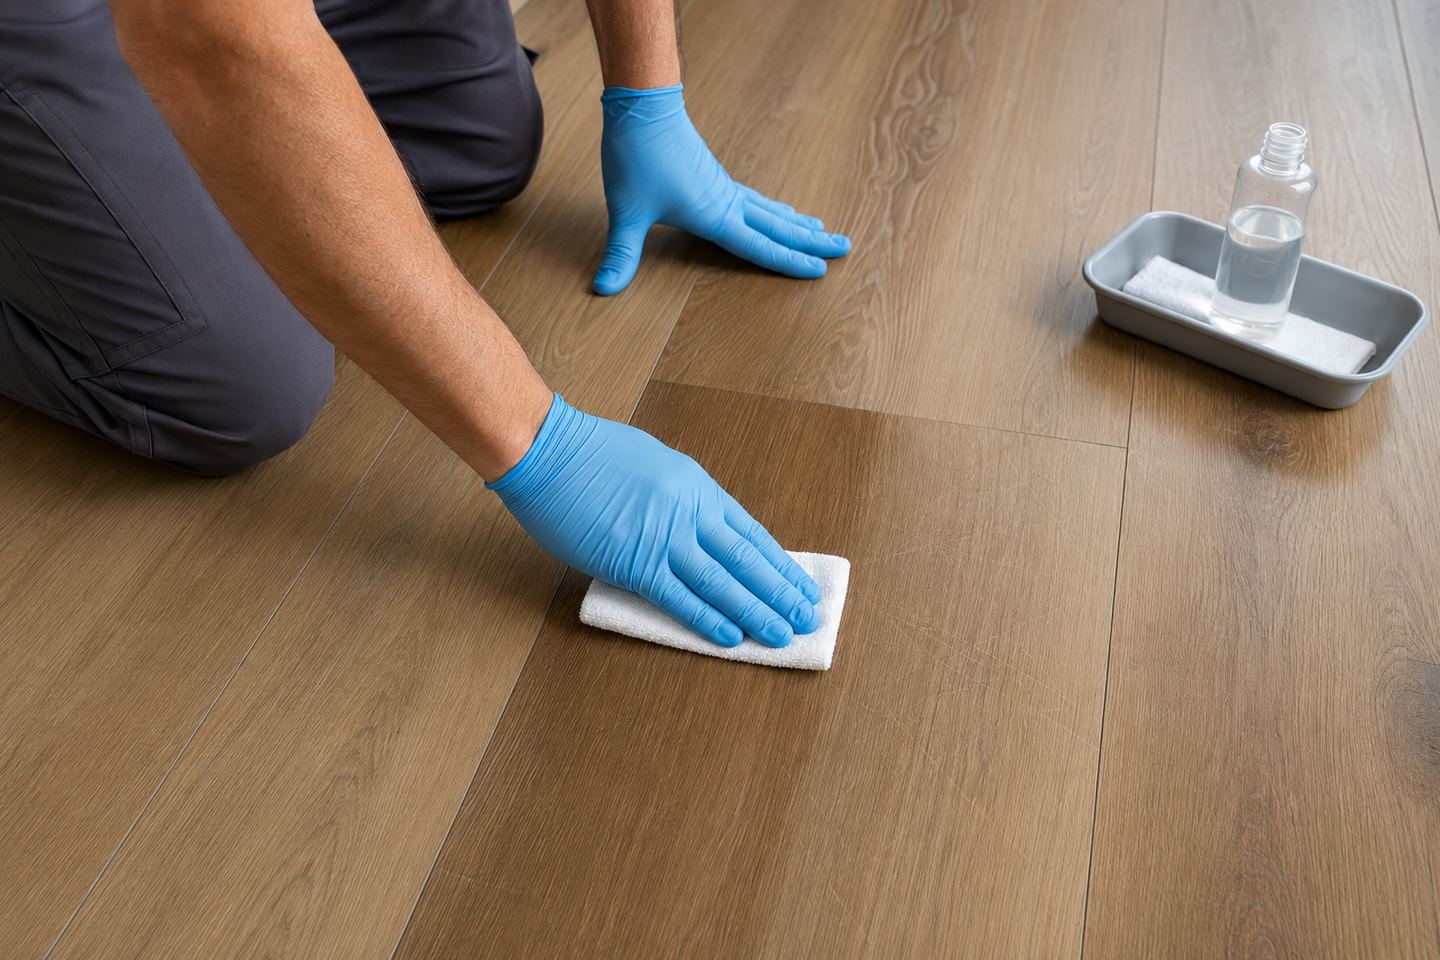
Step 3: Use the Manufacturer’s Restoration System
Some LVT manufacturers provide a two-stage process that removes residue and renews the protective finish. Karndean states that light scratches can be improved with its Remove and Refresh process. Its care guide specifies thin, even finish coats rather than a heavy local application.
Apply only the amount stated in the instructions. Keep traffic off the area for the full drying period.
Step 4: Judge the Repair in Normal Lighting
A light scratch may remain visible under a flashlight or strong side lighting. The practical goal is to make it blend into the surrounding texture during normal use.
On installation jobs, I judge a cosmetic repair while standing, not with my face six inches from the plank. Excessive rubbing often creates a larger gloss difference than the original scratch.
How to Repair a Deeper Scratch Without Replacing the Plank
A narrow scratch that reaches the printed film needs color correction rather than polishing.
Use Only a Compatible Color-Matched Repair Product
Choose a repair marker, putty, or resilient-floor compound supplied or approved by the flooring manufacturer. Match the background tone first, then add darker grain only when the repair system allows it.
The safest process is:
- Clean and dry the damaged area.
- Test the color on a spare plank or hidden edge.
- Apply a very small amount inside the scratch.
- Remove material from the surrounding texture before it cures.
- Allow the product to harden for the stated time.
- Add an approved protective topcoat only when the repair instructions require one.
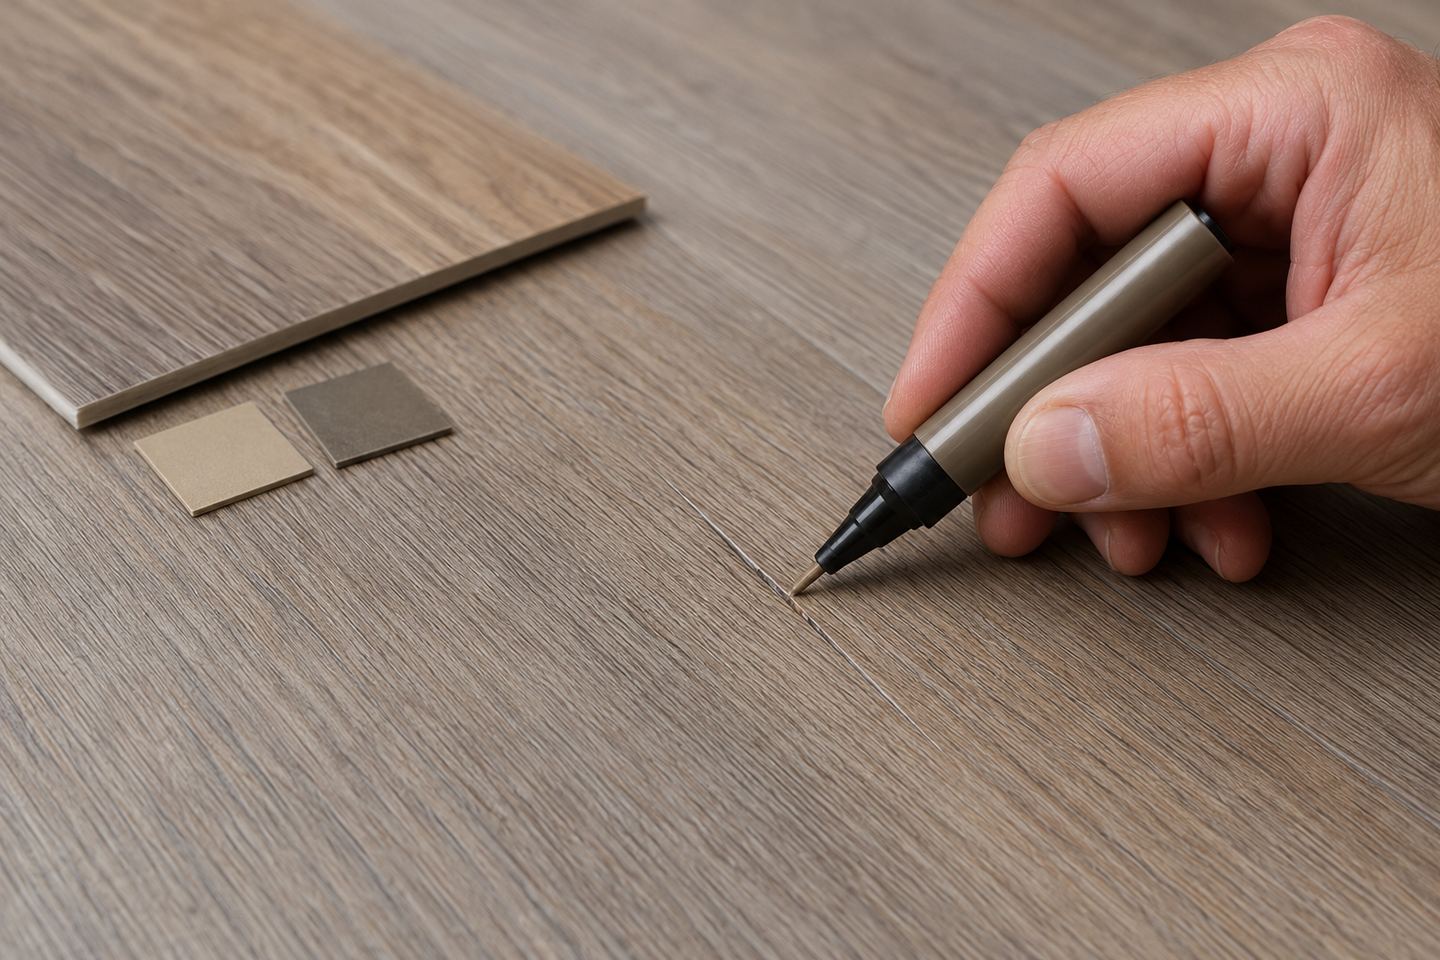
A filler can disguise a groove. It cannot recreate the original factory embossing or restore the full wear-layer specification.
Use Several Small Color Adjustments
Many oak-look planks contain three or more tones. One thick line of a single repair color often looks artificial.
Build the repair in small amounts. Keep the filler inside the damaged line and preserve the surrounding grain texture.
How to Fill a Small Gouge in LVP
A small gouge can sometimes be stabilized and concealed when the plank remains flat and the locking edges are intact.
Use a manufacturer-approved vinyl repair compound designed to remain bonded to resilient flooring. Avoid wood filler, wall spackle, general caulk, epoxy putty, or automotive filler unless the flooring manufacturer specifically approves it.
Practical Gouge Repair Process
- Remove loose, raised fragments with a sharp blade held nearly flat.
- Do not enlarge the gouge.
- Clean the recess and let it dry.
- Press a small amount of color-matched compound into the void.
- Level the compound with a plastic applicator.
- Wipe the textured surface before the filler cures.
- Protect the area from foot traffic during curing.
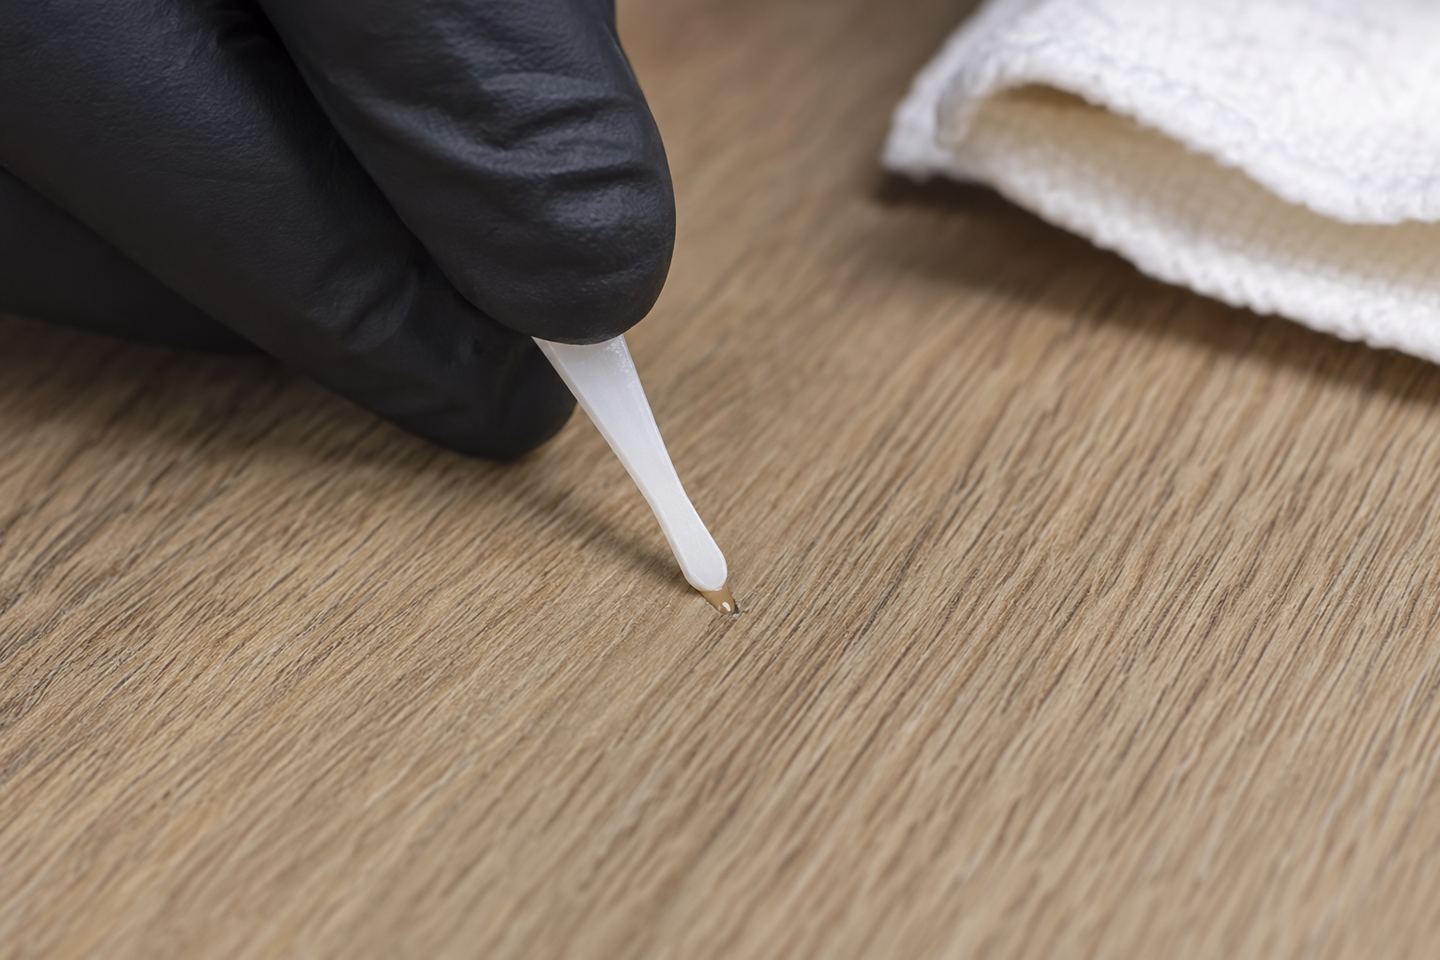
This is a cosmetic repair. It is most suitable for a small, stable defect away from a click joint.
Do not fill a gouge that continues to spread, flex, or lift. Movement beneath the repair will break the patch.
Scratch Repair Methods: Pros and Cons
| Repair option | Pros | Cons |
|---|---|---|
| Cleaning or scuff removal | Low risk when manufacturer-approved; preserves the original finish | Does not repair a true groove |
| Surface refresher | Improves fine scratching and uneven sheen across a larger area | Product-specific; may change gloss if applied unevenly |
| Color repair marker | Fast and useful for hairline color loss | Does not fill missing material |
| Vinyl repair compound | Can conceal small gouges and cuts | Texture and sheen may not match perfectly |
| Professional spot repair | Better color blending and surface preparation | Costs more than a basic DIY repair |
| Plank replacement | Restores the original factory surface | Requires spare material and more labor |
DIY Scratch Fixes That Can Make the Damage Worse
Several popular online methods can permanently change the floor.
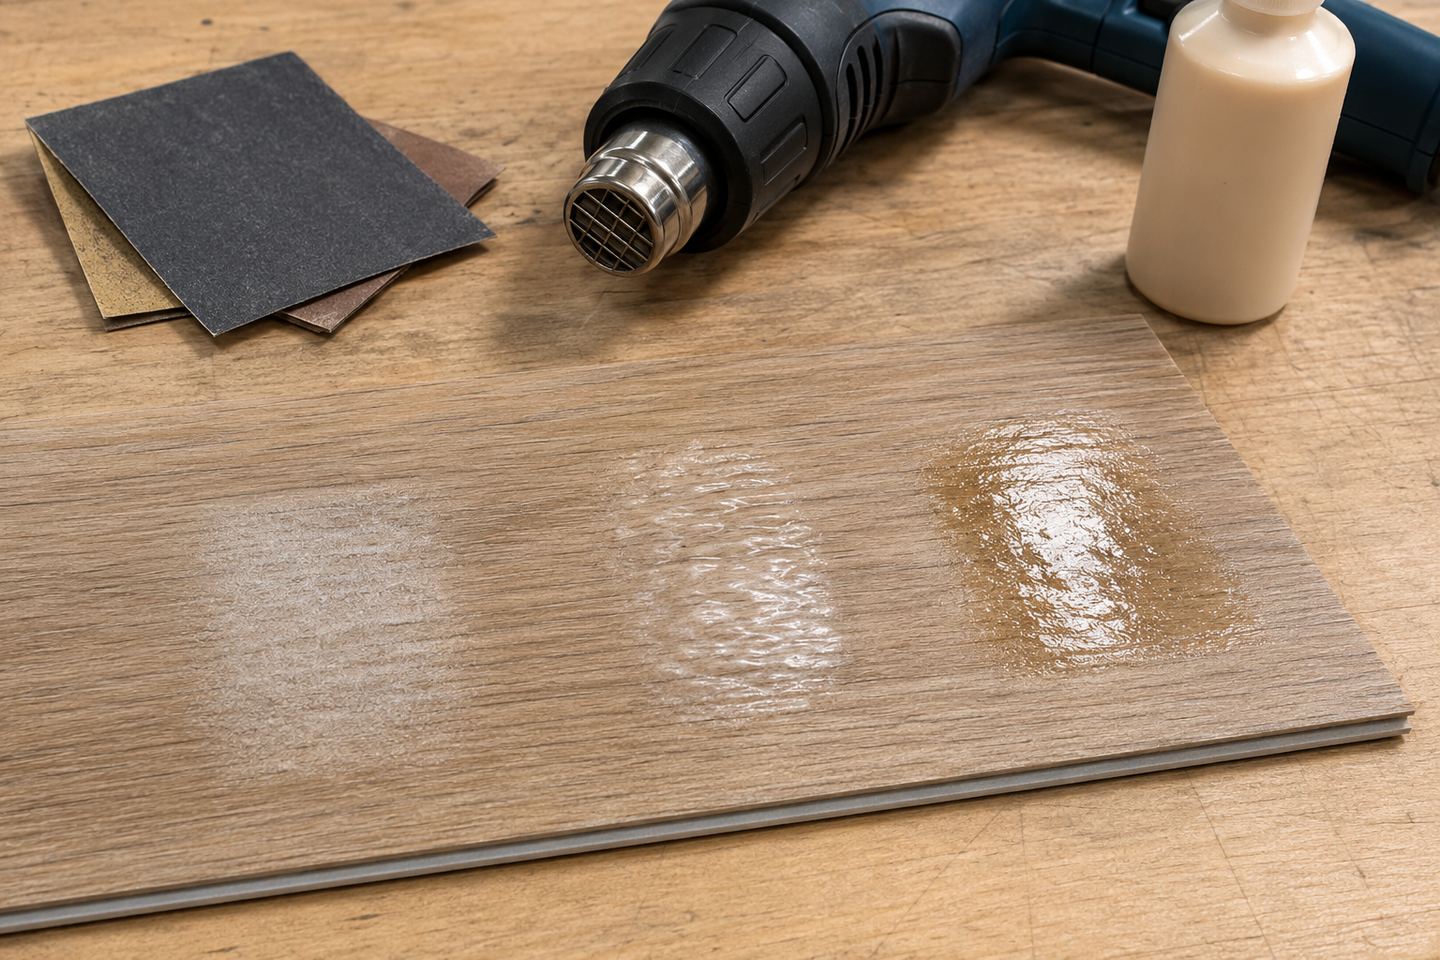
Do Not Sand the Scratch
Sandpaper, steel wool, abrasive pads, and melamine foam can flatten the embossed grain or dull the coating. Mohawk advises against abrasive cleaners and tools on luxury vinyl.
Do Not Use Heat to “Melt” the Scratch Closed
A hair dryer, heat gun, iron, or open flame can distort vinyl, change its gloss, weaken adhesive, or damage a rigid core joint. Excessive heat damage is commonly excluded from flooring warranties.
Do Not Apply Wax, Oil, or Furniture Polish
These products can leave a slippery residue and create a shiny patch. COREtec advises against wax, floor polish, vinegar, citrus cleaners, and unapproved steam cleaning on LVP.
Do Not Assume the Scratch Is Covered by Warranty
Most wear warranties cover wear-through, not accidental scratching. Shaw states that gloss reduction, surface scratches, gouges, scuffs, punctures, and cuts are not considered normal wear-through claims.
Photograph unexplained damage before attempting repair. Contact the retailer when several planks show the same coating failure without an obvious cause.
Installation and Subfloor Issues That Affect Repair Success
Subfloor problems do not directly create a surface scratch. However, movement can make a damaged plank flex and cause a filler patch to fail.
Resilient flooring substrates should be dry, clean, smooth, and structurally sound. Karndean’s installation guidance also references ASTM F710 for concrete substrate preparation.
Click-Lock LVP
A floating click-lock plank must move as part of the floor. A repair near a broken locking edge will rarely stay stable.
Check for:
- Vertical movement under foot
- A raised end joint
- A cracked click profile
- Missing perimeter expansion space
- Cabinets or fixtures pinning the floor
Glue-Down LVP
A glue-down plank has less vertical movement when the adhesive bond is sound. Local cosmetic repairs can perform well, but hollow spots or adhesive failure must be corrected first.
Loose-Lay LVP
Loose-lay products depend on subfloor smoothness, backing grip, and the specified perimeter or grid adhesive. A loose or curling plank should be secured before its surface is repaired.
Nail-Down Installation
Vinyl plank flooring is not installed like solid hardwood. Do not nail through a plank to stop movement. Fasteners damage the waterproof surface and prevent a floating floor from expanding correctly.
Prevent New Scratches After the Repair
The best repair is temporary if the cause remains.
- Install felt protectors under furniture.
- Use wider load-bearing protectors under heavy items.
- Lift furniture instead of dragging it.
- Keep pet nails trimmed.
- Remove grit frequently with a soft broom or hard-floor vacuum.
- Use non-staining entrance mats approved for vinyl.
- Place a suitable hard-floor mat beneath rolling office chairs.
- Replace damaged furniture glides immediately.
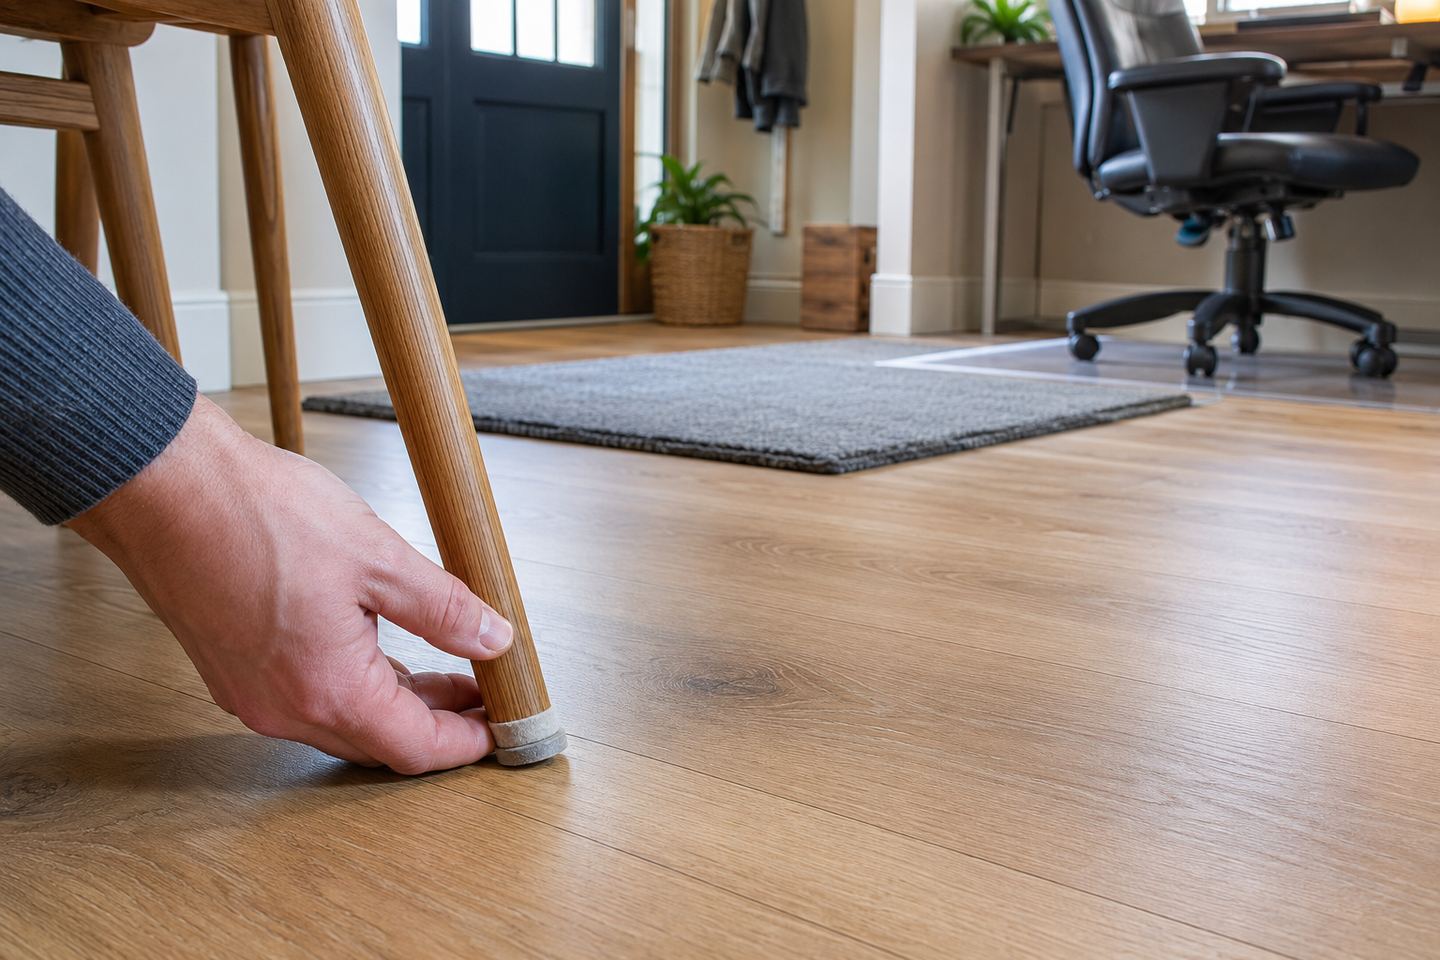
Grit is one of the most common causes of fine surface scratching. Karndean specifically recommends regular sweeping and protective pads to reduce this damage.
What Has Changed for Vinyl Scratch Repair in 2026?
Current repair principles remain consistent. Manufacturers still separate surface maintenance from structural plank repair.
The main product changes are in prevention. Newer floors increasingly use reinforced polyurethane, ceramic, or aluminum-oxide surface systems. PVC-free resilient products are also expanding. Mohawk’s PureTech line uses a PVC-free construction and markets higher scratch resistance than traditional LVT.
These technologies improve resistance. They do not make vinyl plank sandable or universally repairable. The product-specific care guide remains the controlling document.
Maintenance and Lifecycle Cost Implications
A careful cosmetic repair can extend the useful appearance of an otherwise sound floor. This is especially valuable in kitchens, hallways, living rooms, and pet areas where one damaged plank may sit within a large continuous installation.
However, repeated repairs across several traffic lanes usually indicate a prevention problem or a surface that is not suited to the use level.
Wear-layer thickness, coating chemistry, furniture protection, grit control, and installation stability all influence appearance retention. A thicker wear layer helps with abrasion, but no wear-layer number guarantees resistance to sharp metal, dragged appliances, or damaged chair casters.
Frequently Asked Questions
Can You Repair Scratches in Vinyl Plank Flooring Without Replacing It?
Yes. Scuffs can often be cleaned away, and light scratches may improve with an approved surface-restoration product. Small grooves can be concealed with a compatible color repair product. Deep cuts through the printed film or damage to the core cannot be fully restored without plank replacement.
What Is the Best Scratch Repair for Vinyl Plank Flooring?
The best method depends on depth. Use approved cleaner for scuffs, a manufacturer restoration system for fine surface scratches, and a color-matched resilient-floor compound for small gouges. Avoid sanding, heat, wax, and generic fillers because they can damage the wear layer.
Can I Use a Magic Eraser on Scratched Vinyl Flooring?
Do not use melamine foam unless the manufacturer approves it. Its micro-abrasive surface can change the sheen and flatten embossed texture. A neutral cleaner and soft microfiber cloth are safer first steps.
Does a 20 Mil Wear Layer Prevent Scratches?
No. A 20 mil wear layer improves abrasion durability, but sharp objects can still cut it. Wear-layer thickness measures the clear protective layer. It does not measure scratch depth, core strength, or the quality of the surface coating.
Can Vinyl Plank Flooring Be Refinished?
Standard residential LVP cannot be sanded and refinished like hardwood. The wood design is a printed film beneath a thin clear wear layer. Surface refresh products may improve fine marks, but they do not create a new factory wear layer.
When Is a Scratch Too Deep to Repair?
A scratch is too deep for a reliable cosmetic repair when the core is exposed, the plank is cracked, the edge is lifting, or the locking joint is damaged. A filler may hide the color difference, but it will not restore structural strength or factory protection.
Final Verdict
Most scratches in vinyl plank flooring can be improved without immediate replacement. Start with the least aggressive method and follow the exact care instructions for your flooring brand.
Clean scuffs, restore fine surface scratches, and use compatible color repair products only for small stable defects. Do not sand, heat, wax, or coat the floor with an unapproved product. When damage reaches the core or locking edge, a cosmetic patch is no longer a dependable repair.


