
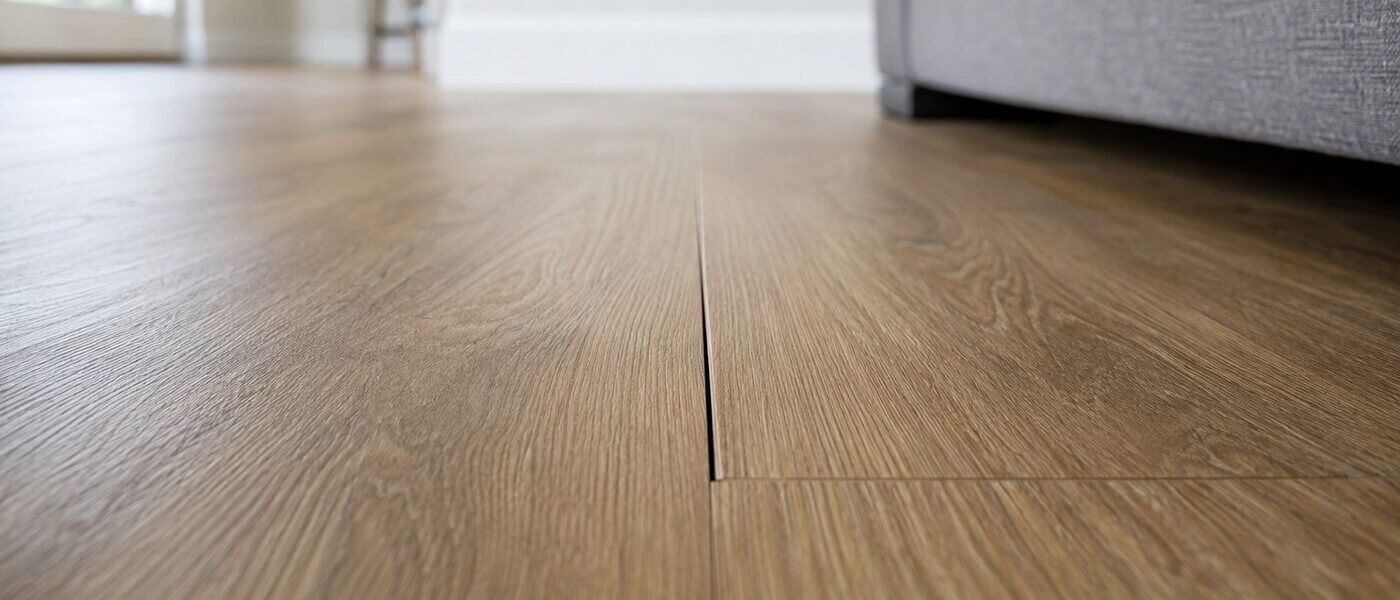
A separated vinyl plank joint may look like a minor cosmetic flaw. In practice, it often reveals a problem beneath the floor or around its perimeter.
Vinyl plank flooring separating is usually caused by an incompletely engaged click-lock joint, restricted floor movement, an uneven subfloor, temperature changes, or a damaged locking edge. Glue-down planks can also separate when the adhesive bond fails.
The best repair is not simply forcing the gap shut. You must identify and correct the underlying cause first.
Quick Facts About Vinyl Plank Flooring Separation
| What you see | Most likely cause | Best fix |
|---|---|---|
| One small end-joint gap | Joint was not fully seated | Close and reseat the joint |
| Several gaps in the same direction | Floating floor is pinned or restricted | Restore perimeter clearance |
| Gap returns after closing | Subfloor movement or damaged lock | Correct subfloor or replace plank |
| Plank moves when stepped on | Low spot, deflection, or unsuitable underlayment | Remove flooring and flatten substrate |
| Chipped tongue or groove | Broken locking mechanism | Replace the affected plank |
| Gaps near a sunny patio door | Excessive surface heating | Control sunlight and inspect expansion space |
| Glue-down plank edges lifting | Adhesive, moisture, or substrate failure | Rebond with the specified flooring adhesive |
| Dirt collecting in an open seam | Separation has remained untreated | Clean the joint and complete a permanent repair |
Why Vinyl Plank Flooring Separates
Vinyl planks do not normally move apart without a reason. A properly installed click-lock floor acts as one connected floating assembly.
That assembly must be fully locked, supported from below, and free to move slightly around walls and fixed objects. A failure in any of these areas can place stress on the plank joints.
The Locking System Was Never Fully Engaged
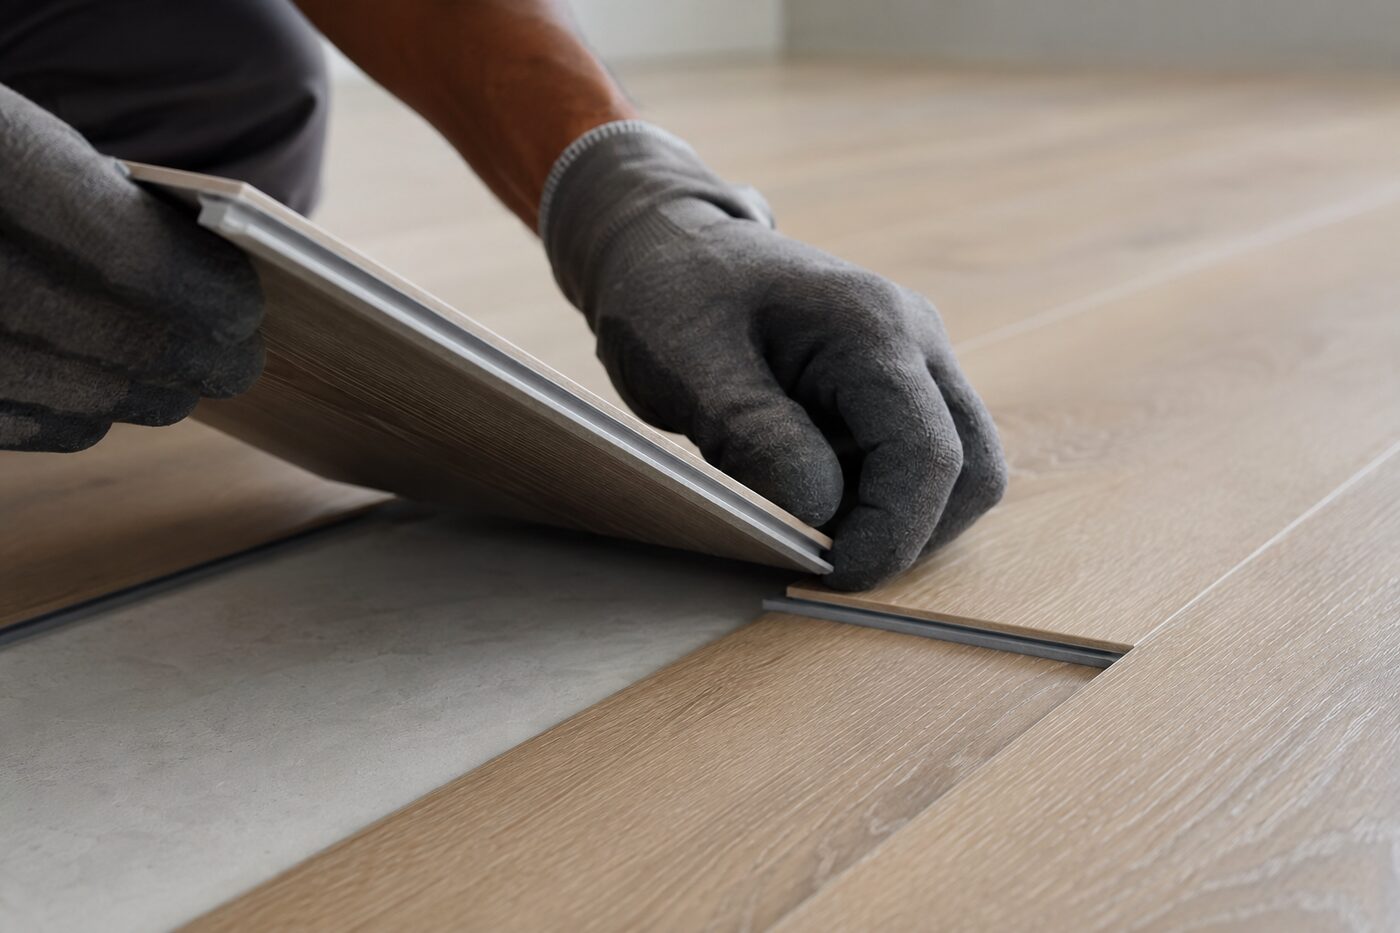
Click-lock vinyl uses precisely formed tongues, grooves, or locking lips along each plank edge. These profiles must engage completely during installation.
A joint can appear closed from standing height while remaining partly unlocked underneath. Normal foot traffic then works the connection loose.
Current Mannington rigid-core installation instructions require the planks to be assembled using the specified locking method. The manufacturer also directs installers to check that every joint is fully engaged.
This problem is common around:
- Door casings
- Kitchen toe kicks
- The final row
- Narrow hallways
- Planks installed backward into an existing row
These locations give the installer less room to angle and lock each plank correctly.
The Floating Floor Has Been Pinned in Place
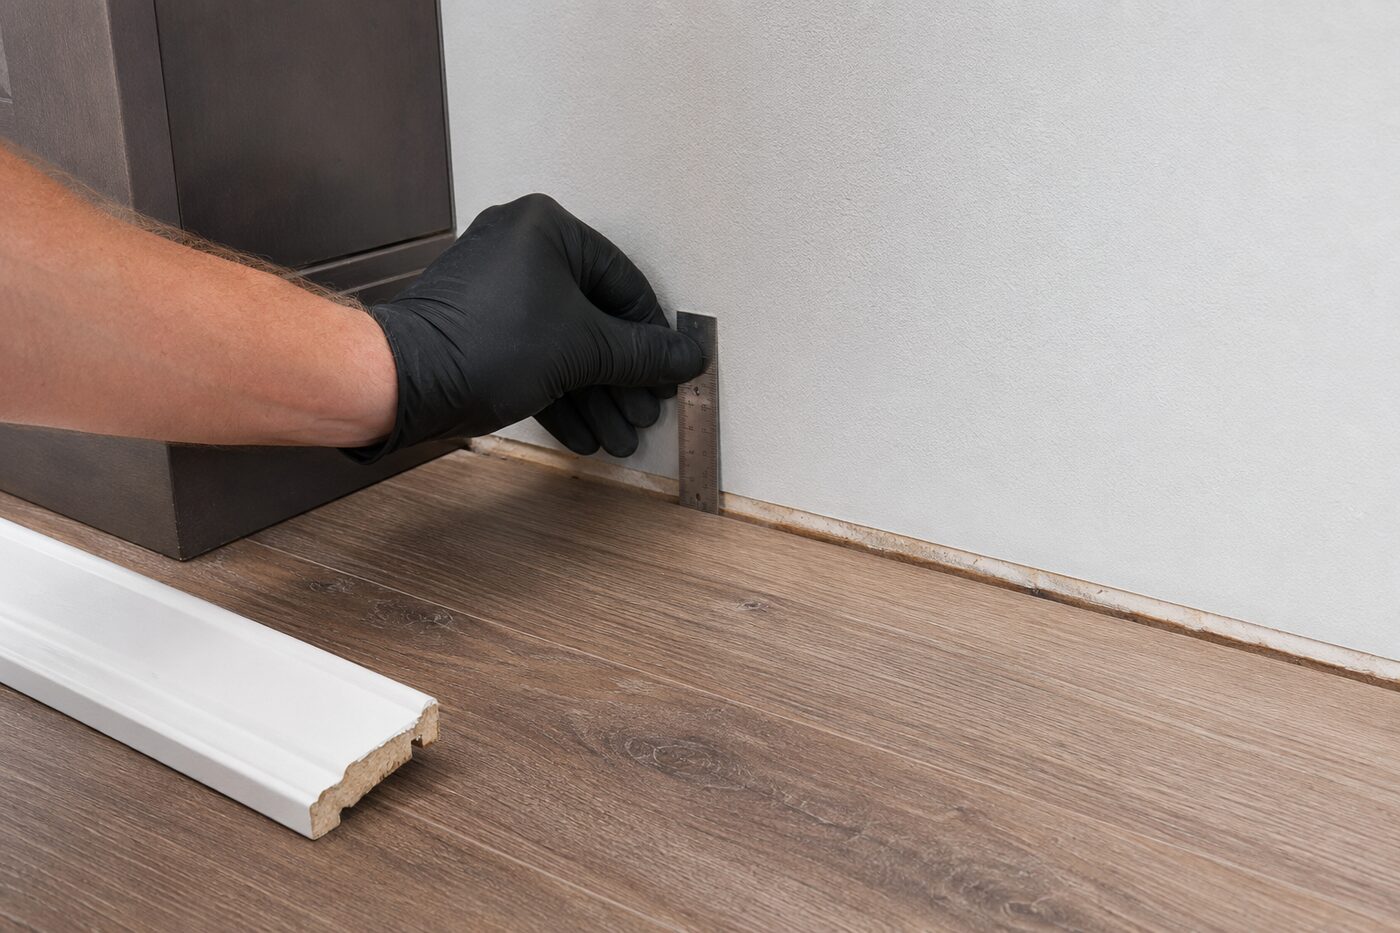
A floating vinyl floor must not be trapped beneath cabinets, islands, wall framing, tightly fitted trim, or fasteners driven through the planks.
When part of the floor is pinned, normal thermal movement cannot spread evenly across the installation. Stress may then pull an end joint apart elsewhere in the room.
Mannington’s current rigid-core guide specifies a 1/4-inch expansion space for installations up to 50 by 50 feet. Larger areas require more clearance.
The manufacturer also states that attached-pad flooring should not receive an additional pad and that the floor must remain free to float.
Expansion requirements are product-specific. Always use the dimensions listed in the installation manual for your exact flooring.
The Subfloor Is Not Flat Enough
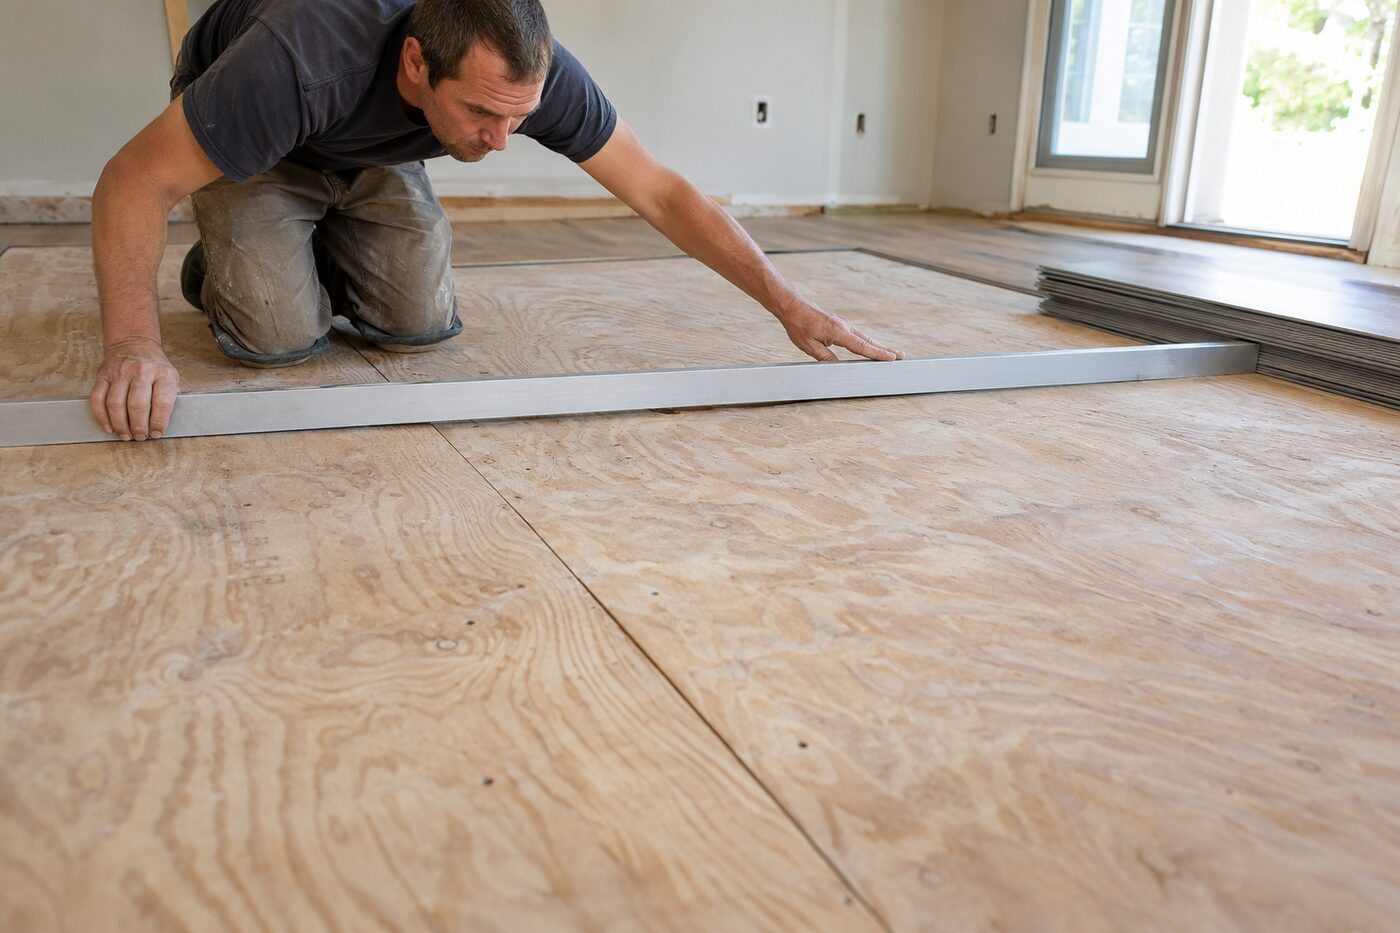
Subfloor flatness is one of the most frequently missed causes of vinyl plank flooring separation.
A rigid plank can bridge a shallow dip, but it does not eliminate the dip. Each footstep pushes the joint downward and allows it to rise again.
That repeated vertical movement eventually strains the locking profile.
Mannington requires its rigid-core subfloors to be flat within:
- 3/16 inch over 10 feet
- 1/32 inch over 12 inches
Its March 2026 installation guide continues to use these limits.
A low spot is especially damaging beneath a short-end joint. Short joints have less locking length than long side joints, so movement is concentrated across a smaller connection.
The Wrong Underlayment Was Installed
More padding does not make a rigid vinyl floor safer.
Many SPC and WPC planks already have an attached acoustic pad. Adding another soft underlayment can create excessive vertical movement under the joints.
That movement is sometimes described as a softer or more comfortable floor. On the job site, it often feels like a plank edge dipping when stepped on.
Mannington specifically states that additional padding is not recommended beneath its attached-pad rigid-core products.
Follow the product-specific underlayment requirements because not every vinyl floor needs a separate underlayment.
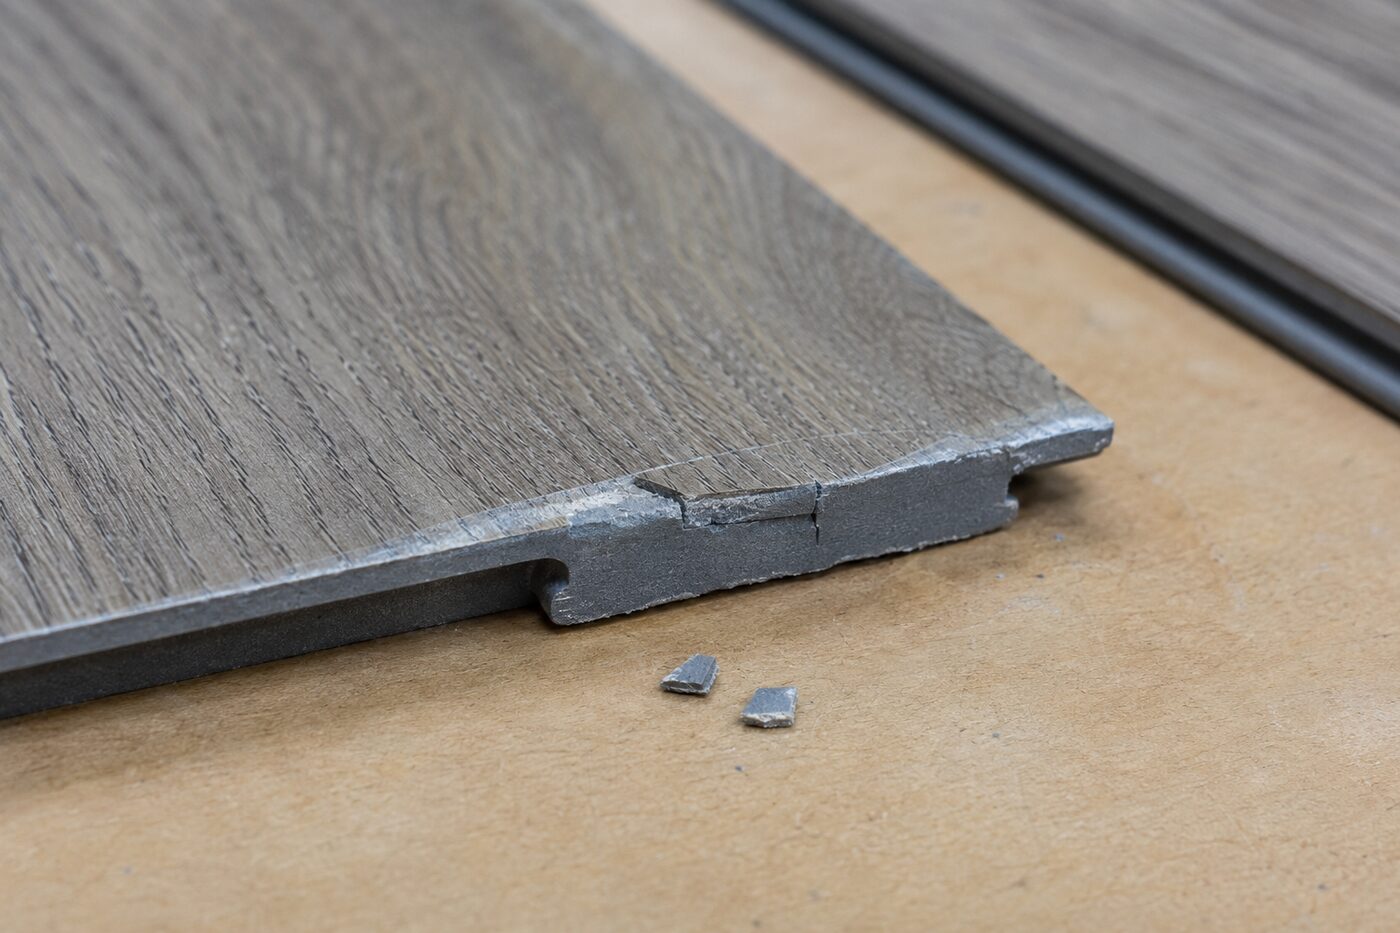
A Locking Edge Is Cracked or Crushed
A click profile can be damaged during installation by excessive hammering, forcing a plank at the wrong angle, or striking the decorative edge directly.
It can also fail later when a joint repeatedly flexes over an uneven subfloor. Once the locking lip cracks, closing the visible gap will not restore the original mechanical connection.
Look for:
- A chipped corner
- A raised edge
- White stress marks in the core
- Loose fragments inside the gap
- A joint that opens immediately after being closed
A damaged locking profile requires plank replacement.
Direct Sunlight Is Overheating the Floor
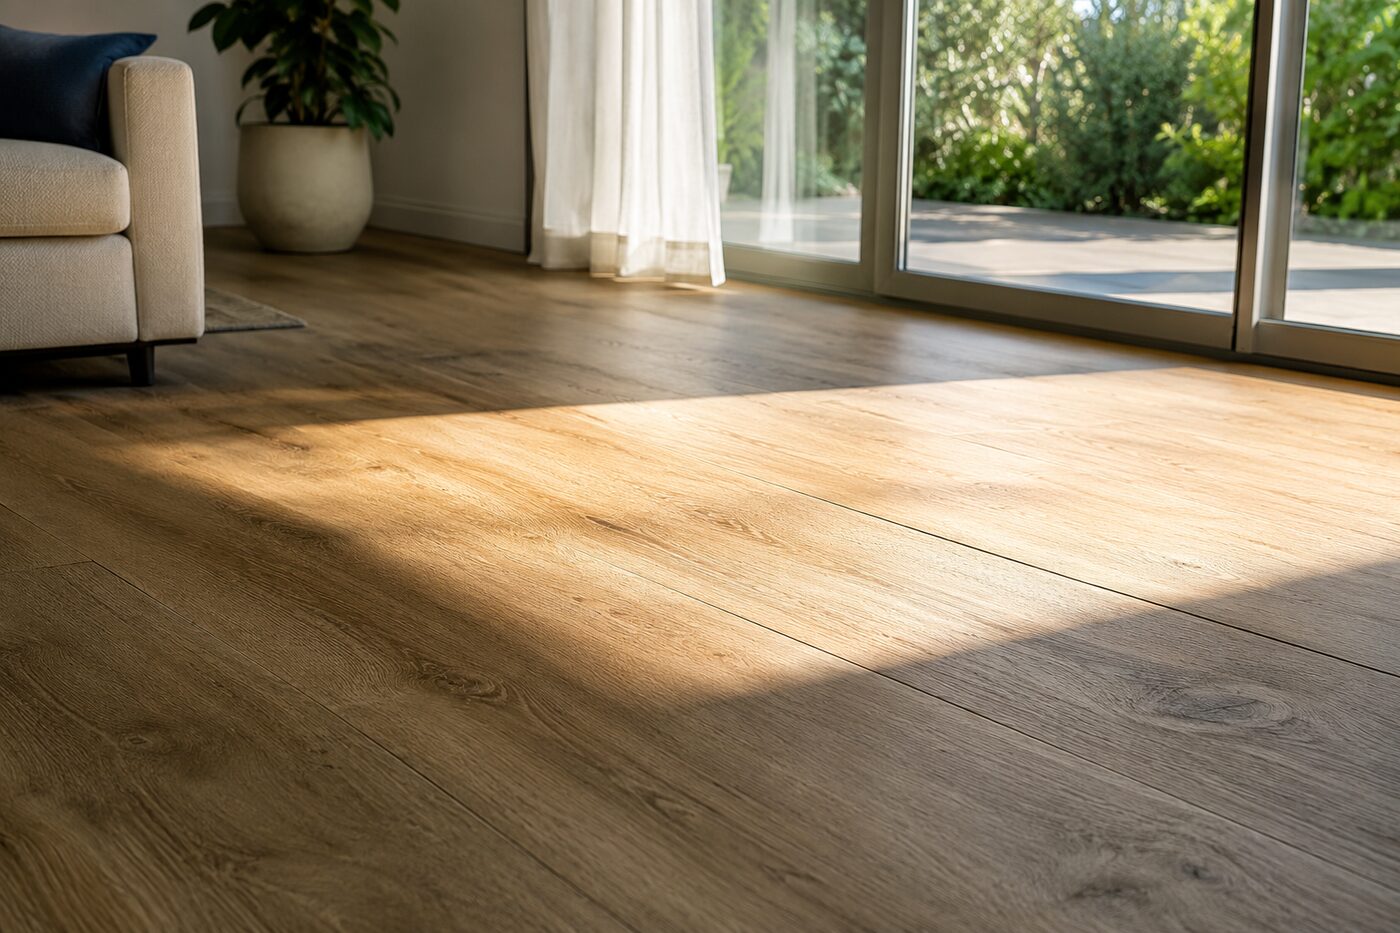
Large windows and sliding glass doors can create much higher floor-surface temperatures than the room thermostat indicates.
The affected planks expand as they heat. If the installation lacks sufficient movement space, pressure builds across the floor.
Joints can shift, peak, buckle, or become damaged.
Mannington advises protecting its floors from prolonged extreme sunlight because heat and sunlight can produce thermal expansion, discoloration, buckling, or delamination.
Blinds, curtains, solar shades, or UV-control window films can reduce concentrated surface heating.
Moisture Has Affected the Adhesive or Subfloor
The vinyl surface may be waterproof while the complete floor system is not.
With click-lock rigid core, water does not normally cause the PVC or mineral-filled core to swell like wood fiber. However, moisture can affect a plywood subfloor, support mold beneath the flooring, or enter an already separated seam.
With glue-down vinyl, excessive slab moisture can weaken the adhesive bond.
ASTM F710 requires concrete intended for resilient flooring to be dry, clean, smooth, structurally sound, and tested for moisture. Manufacturer instructions still take precedence over the general standard.
Pet accidents and kitchen spills are more likely to worsen an existing open joint than to pull a correctly locked rigid-core joint apart.
Does Wear Layer Thickness Prevent Separation?
No. The wear layer protects the printed design and surface finish. It does not hold two planks together.
For reference:
- A 12-mil wear layer is about 0.305 mm thick.
- A 20-mil wear layer is about 0.508 mm thick.
- One mil equals 0.001 inch.
A 20-mil plank may resist surface wear better than a 6-mil plank. It can still separate if its locking profile is damaged or its subfloor is uneven.
Janka hardness ratings also do not apply to vinyl plank. Janka testing measures the indentation resistance of wood, not PVC, SPC, or WPC flooring.
Rigid SPC Versus WPC Joint Performance
SPC has a dense, stiff mineral-filled polymer core. Its rigidity improves indentation resistance but gives the plank less ability to follow subfloor irregularities.
WPC uses an expanded polymer core. It generally feels warmer and more forgiving underfoot, although its joints still require a flat, stable base.
Flexible glue-down vinyl has no floating click connection. Its seam performance depends mainly on substrate preparation, adhesive transfer, rolling, and environmental conditions.
How to Diagnose the Cause Before Repairing the Gap
Do not begin by adding glue. Start by determining why the joint moved.
Check Whether the Plank Flexes
Stand beside the gap and apply normal foot pressure around both planks.
Movement, clicking, or a hollow response indicates a low spot, deflecting wood subfloor, soft underlayment, or damaged locking edge.
Inspect the Perimeter
Remove a short section of shoe molding near the direction in which the floor needs to move.
Check for clearance between the plank and wall. Also inspect door jambs, transitions, cabinets, pipes, fireplace surrounds, and sliding-door tracks.
Baseboards and quarter-round should cover the expansion space without pressing down tightly enough to restrict the floor.
Examine the Locking Edges
Use a flashlight to inspect the gap.
A clean, straight gap can indicate an intact but disengaged joint. Broken fragments, irregular edges, or a raised corner indicate physical damage.
Check Subfloor Flatness
Place a long straightedge across the area.
A visible low spot beneath the separated joint must be corrected. Closing the gap without fixing the substrate will usually provide only temporary improvement.
How to Fix Gaps Between Click-Lock Vinyl Planks
Method 1: Reclose an Intact Joint
This method is suitable for one isolated gap when:
- The locking edges are undamaged.
- The floor does not flex.
- Adequate expansion space exists.
- The row can move freely.
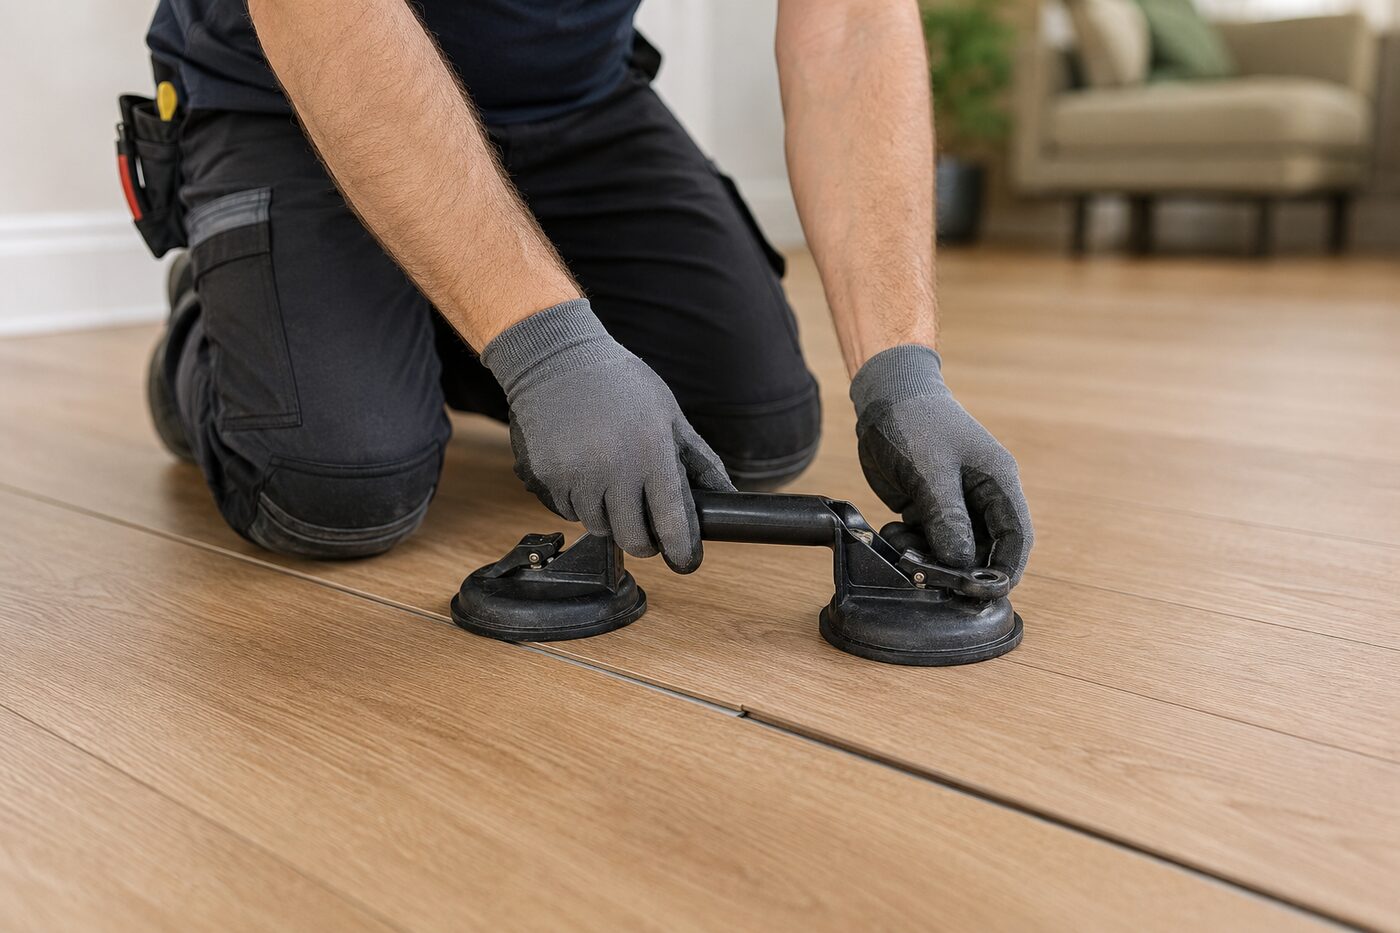
Clean debris from the opening with a vacuum. Move the plank or connected row toward the gap using a flooring suction cup or manufacturer-approved gap-closing tool.
Do not strike the finished plank edge directly.
During installation, manufacturers commonly specify a tapping block or scrap plank to protect the locking profile.
If the joint closes firmly and stays closed, monitor it for several weeks. A gap that returns has not been permanently corrected.
Method 2: Relieve a Pinned Floating Floor
Remove the molding or transition nearest the restricted edge.
Trim the vinyl to restore the expansion clearance required by the product manual. Check all fixed vertical surfaces, not only the nearest wall.
Once the pressure is released, shift the affected row and close the joint. Reinstall trim without fastening through the vinyl.
Method 3: Correct the Subfloor
When a gap sits above a dip or flexible panel seam, the proper fix requires removing planks back to the affected area.
Fill concrete depressions with a compatible cementitious patch or leveling product. Secure loose wood panels and correct excessive deflection before reinstalling the floor.
ASTM F710 requires concrete irregularities and non-moving depressions to be filled or smoothed with an appropriate patching or underlayment compound.
Method 4: Replace a Plank With a Broken Lock
A perimeter plank can often be reached by disconnecting the floor row by row. This preserves the factory locking system.
For an inaccessible plank in the middle of the room, some manufacturers provide a cut-out replacement procedure.
Mannington’s repair method removes the damaged plank, modifies specified locking edges, and uses its approved seam sealer before weighting the replacement.
That procedure is product-specific. Do not cut or glue a replacement until you have checked your manufacturer’s repair instructions.
How to Repair Separating Glue-Down Vinyl Planks
Glue-down separation requires a different approach.
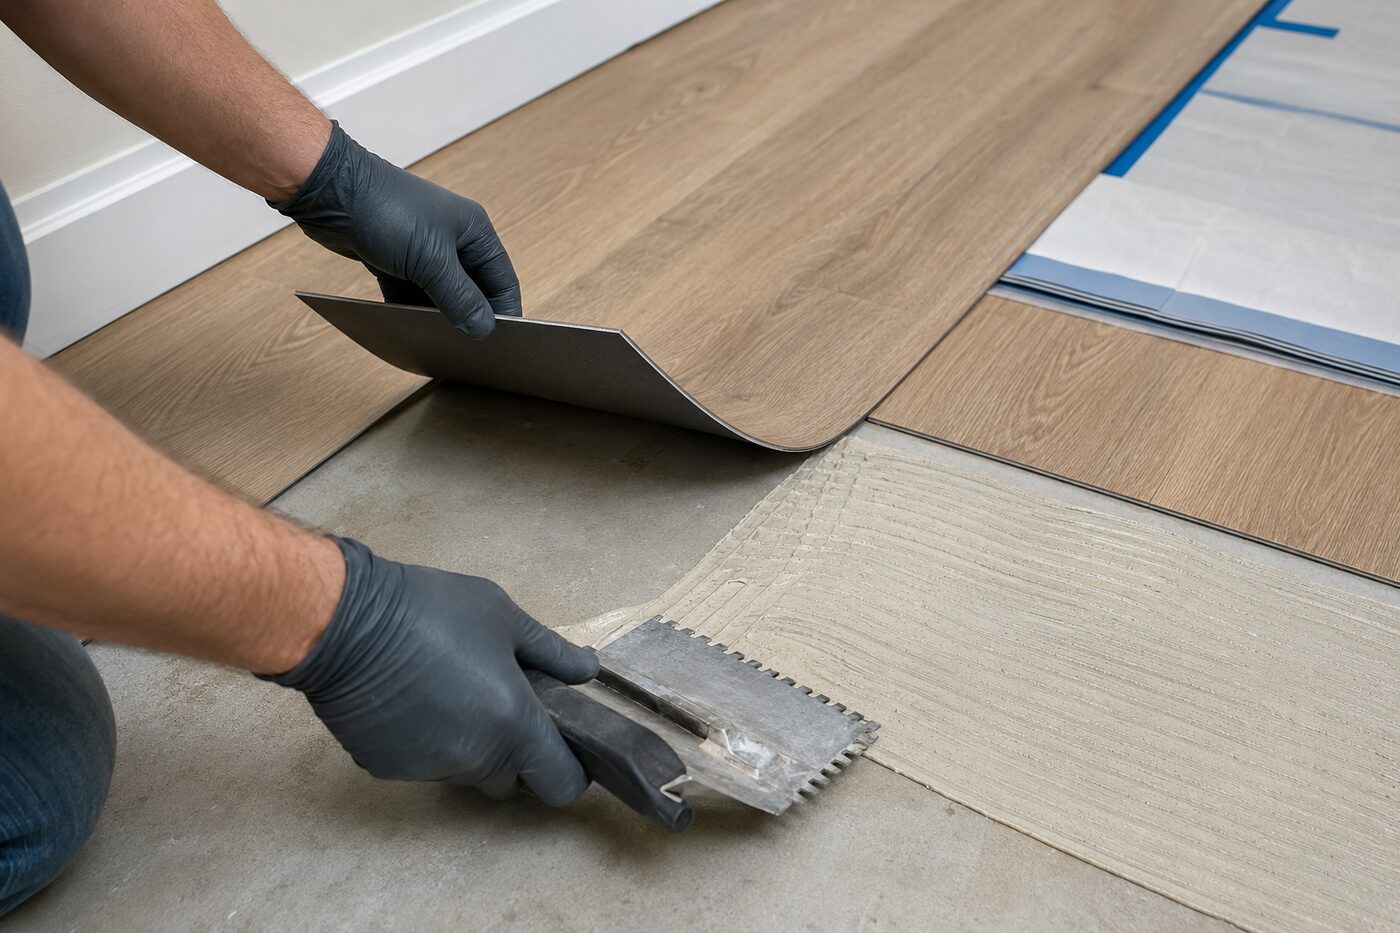
Lift the loose edge carefully and inspect the substrate. Old adhesive, dust, moisture, patching failure, or inadequate adhesive transfer must be corrected before rebonding.
Use only an adhesive approved for the flooring and substrate. Follow its:
- Required trowel size
- Working time
- Rolling requirements
- Moisture limits
- Temperature range
Do not inject construction adhesive or superglue into an LVP seam.
These products can stain the surface, create a rigid lump beneath the plank, and make later repairs difficult.
Temporary Gap Repairs: Pros and Cons
| Repair | Advantage | Limitation |
|---|---|---|
| Suction-cup gap closer | Fast and non-destructive | Gap returns if the cause remains |
| Tapping block | Protects locking edge during assembly | Requires room for the row to move |
| Adhesive in click joint | May hold a modified replacement | Can void warranty when not approved |
| Filler or caulk in gap | Hides dirt temporarily | Does not restore the mechanical lock |
| Full plank replacement | Restores a damaged joint correctly | Requires more labor and spare material |
| Subfloor correction | Solves recurring movement | Usually requires partial disassembly |
Maintenance and Long-Term Performance
Keep indoor temperatures within the range specified for your flooring. Current rigid-core guidance commonly assumes climate-controlled occupied conditions, although exact limits differ by product.
Use wide furniture protectors and avoid dragging refrigerators, islands, or heavy furniture across floating planks. Concentrated loads can restrict movement or damage joint edges.
Clean open gaps promptly. Sand and grit inside a seam can prevent the joint from closing fully and abrade the decorative edges.
From a lifecycle-cost perspective, substrate correction is more expensive than simply closing a gap. It is also far less costly than replacing multiple rows after repeated flexing damages their locking profiles.
As of 2026, the core installation requirements remain consistent. Current manufacturer guidance still prioritizes:
- Flat substrates
- Fully engaged locking systems
- Correct expansion space
- Controlled temperatures
- Product-approved underlayment
- Proper moisture testing
Material-health certification has continued to develop, but no surface coating or thicker wear layer replaces these installation fundamentals.
When to Call a Flooring Professional
Professional inspection is appropriate when:
- Gaps appear in several rooms.
- Planks flex or click underfoot.
- The floor is trapped beneath cabinets.
- The locking edges are broken.
- Concrete moisture is suspected.
- The floor remains under an installation warranty.
- A large connected area must be disassembled.
Photograph the gaps before moving any planks. Keep the product carton, installation guide, purchase receipt, batch information, and spare material.
Frequently Asked Questions
Why Is My Vinyl Plank Flooring Separating?
Vinyl plank flooring separates when joints are not fully locked, the floor cannot move at its perimeter, or the subfloor allows excessive flexing. Temperature changes and broken locking edges can also create gaps. Glue-down flooring separates when the adhesive or substrate bond fails.
Can Separated Vinyl Planks Be Pushed Back Together?
An intact click-lock joint can often be moved back into place with a suction cup or protected tapping method. First confirm that the locking profile is undamaged and the floor has enough perimeter clearance. A joint that repeatedly opens requires substrate correction or plank replacement.
Should I Glue Vinyl Plank Joints Together?
Do not glue a standard floating joint unless the flooring manufacturer specifically approves that repair. Glue can restrict floor movement and interfere with future disassembly. Some manufacturers allow an approved seam sealer for modified replacement planks, but that procedure does not apply to every click-lock product.
Will Humidity Make Vinyl Plank Flooring Separate?
Normal indoor humidity does not affect rigid vinyl like it affects solid hardwood. However, humidity can affect plywood subfloors, adhesives, and the surrounding building structure. Large temperature changes and direct solar heating usually create more movement in rigid-core vinyl than ordinary seasonal humidity.
Can an Uneven Subfloor Cause Gaps Between Vinyl Planks?
Yes. A low spot allows the planks and locking joints to move vertically under foot traffic. Repeated flexing can disengage or break the locking profile. The lasting repair is to remove the affected section, flatten or stabilize the subfloor, and replace damaged planks.
Can Pet Urine Cause Vinyl Planks to Separate?
Pet urine does not normally shrink or swell a rigid waterproof vinyl core. It can enter an existing gap, affect a wood subfloor, produce odor beneath the flooring, or weaken some adhesive installations. Clean accidents quickly and repair open joints before liquid reaches the substrate.
Is Vinyl Plank Separation Covered by Warranty?
Coverage depends on the product and the cause. Manufacturing defects may qualify, while improper subfloor preparation, insufficient expansion clearance, unapproved underlayment, temperature exposure, or installation damage are commonly excluded. Preserve the floor until the retailer or manufacturer has inspected it.


