By John Walters – Flooring installer turned homeowner’s guide with 10+ years of experience across job sites in the U.S.
If you’re wondering whether LVP is the right flooring choice for your home, you’re not alone. Over the past decade, I’ve seen it become one of the most popular options for families, pet owners, and renovators—and for good reason. It offers the look of real hardwood without the high cost or upkeep. But what exactly is LVP, and why are so many homeowners choosing it?
Let’s break it down.
What Is LVP?
Luxury Vinyl Plank, or LVP, is a type of resilient flooring made to replicate the appearance of natural materials—primarily hardwood, but also stone and tile. What makes it “luxury” is its multi-layered construction and high-definition imaging, which gives it depth, texture, and realism far beyond the old-school vinyl sheets you might remember from the ‘80s.
Unlike real hardwood, LVP is engineered for performance. It’s designed to handle daily life in busy households—pets, spills, kids, you name it. And while it mimics the aesthetic of premium flooring, it doesn’t come with the high cost or maintenance headaches.
The rise in LVP’s popularity over the last five years isn’t just hype—it’s backed by consumer preference. According to a report by Floor Covering Weekly, vinyl flooring (with LVP leading the pack) made up more than 40% of all residential resilient flooring purchases in the U.S. in 2024. Homeowners are looking for that sweet spot between form, function, and budget—and LVP delivers. You can explore more vinyl flooring types here to compare your options.
What Is LVP Made Of?
Understanding the anatomy of LVP will help you choose the right kind for your space. Here’s a deeper breakdown of each layer:
- Backing Layer (Base Layer)
This foundational layer adds stability and helps reduce noise. In higher-end products, the backing may include underlayment for added comfort and sound absorption. It’s also responsible for protecting the floor from moisture seeping up from the subfloor, which is especially important in basements. - Core Layer
The core is the backbone of the plank. Depending on the product, this could be:- Flexible PVC – Offers some bend and is easy to cut, but not as rigid.
- WPC (Wood Plastic Composite) – Contains a foamed core made of wood fiber and plastic. It’s softer underfoot, quieter, and a bit thicker, which makes it a solid choice for living areas and bedrooms.
- SPC (Stone Plastic Composite) – Made with limestone and plastic. It’s denser, stronger, and more water-resistant, perfect for bathrooms, kitchens, or heavy-use commercial spaces. It’s thinner than WPC but doesn’t compromise on strength.
- Design Layer
This is where the visual magic happens. Using advanced photographic printing, the design layer recreates textures, grains, and colors with stunning realism. You’ll find everything from distressed barn wood to marble stone or even patterned tiles. - Wear Layer
The top clear coating that shields the floor from daily wear and tear. Thickness ranges from 6 mil to over 20 mil (1 mil = 1/1000 inch). If you have pets or high foot traffic, go with at least 12 mil. Premium lines often come with ceramic bead or urethane coatings for added scratch resistance. - UV Layer (optional)
Some planks include an additional UV-resistant layer to prevent fading in sunlit rooms. If you’re planning to install LVP in sunrooms or by large windows, don’t skip this.
Each layer plays a critical role in how your LVP performs, feels, and lasts—so don’t choose based on appearance alone.
Why Homeowners Love LVP: Key Benefits
After more than a decade of installing floors, I’ve seen LVP win over homeowners for reasons that go beyond looks. Let’s explore these in detail:
- Waterproof/Water-Resistant
LVP’s water resistance is a game-changer. Unlike laminate or solid hardwood, it doesn’t swell or warp with moisture. That makes it a top choice for kitchens, bathrooms, laundry rooms, and even mudrooms. SPC cores, in particular, are virtually impervious to water. - Scratch & Stain Resistance
The protective wear layer does a lot of heavy lifting. It resists scuffs from pet claws, kid toys, chair legs, and high heels. Most LVPs are also stain-resistant—just wipe up messes without worrying about discoloration. - Low Maintenance
Unlike hardwood, which needs refinishing or special cleaners, LVP thrives on simplicity. Regular sweeping and occasional damp mopping are all you need to keep it looking sharp. Here’s how to care for vinyl plank flooring the right way. - Affordability
While engineered hardwood can cost $5–$10 per sq. ft. (not including labor), most LVP options fall between $2–$4 per sq. ft. Even premium SPC or WPC options are budget-friendly, and if you install it yourself, you save even more. - Style Versatility
Want a rustic farmhouse vibe? Wide-plank weathered oak LVP can do that. Prefer clean, modern lines? Matte-finish ash or smooth concrete-look planks are available too. The design options are virtually endless. - Comfort & Quiet
WPC cores and thicker planks feel more forgiving underfoot compared to tile or laminate. Some products even come with pre-attached padding that absorbs sound—a big plus for multi-level homes. - Easy DIY Installation
Click-lock systems allow many homeowners to install LVP themselves over weekends. You don’t need glue, nails, or years of experience. And if you’ve got an uneven subfloor, floating planks with rigid SPC cores can often hide minor imperfections.
A Few Things to Keep in Mind (Potential Downsides)
LVP is a smart choice for many homes, but no flooring is perfect. After years of working in both high-end homes and modest renovations, here’s what I always tell clients to consider before choosing LVP:
- Dents & Impressions
While LVP resists a lot, it’s not invincible. Heavy furniture or sharp objects can leave dents—especially if the wear layer is thin or the core is soft (like in WPC). For example, I’ve seen a grand piano leave small impressions on WPC planks in a music room that didn’t have furniture pads. The fix? Always use protective pads and avoid dragging heavy items across the floor. Learn about common mistakes when installing LVP that can lead to damage. - Sunlight Sensitivity
Direct, prolonged sunlight can cause some LVP planks to fade over time. While SPC with a strong UV layer does better, cheaper options may yellow or lose color faster. This is a common issue in sunrooms or areas with large south-facing windows. Installing UV-filtering window film or closing curtains during peak sun hours can extend your floor’s life. - Challenging Repairs
If a single plank gets damaged in a glue-down installation, replacing it isn’t as easy as popping it out—especially if it’s in the middle of the room. Even click-lock systems can be tricky if the damaged board is far from the edge. You may need to disassemble a large section or hire a pro. - Environmental Concerns
LVP is made of synthetic materials, primarily PVC (polyvinyl chloride). While some brands now offer recycled or low-VOC options, it’s not biodegradable. If sustainability is a priority for you, research brands that meet FloorScore® or GreenGuard Gold certifications, which ensure better air quality and lower emissions.
These drawbacks don’t necessarily outweigh the benefits, but they’re worth factoring in—especially if you’re making a long-term investment.
How to Install LVP (The Simple Breakdown)
Whether you’re DIYing or hiring a pro, proper LVP installation makes all the difference. I’ve walked hundreds of homeowners through this process, and here’s how it typically unfolds:
1. Subfloor Preparation
Every successful LVP install starts with a level subfloor. Any bumps, dips, or debris can cause planks to sit unevenly or shift over time. For floating floors, I recommend no more than 3/16″ variance over 10 feet. If your subfloor has flaws, here’s how to prepare your subfloor for vinyl flooring like a pro.
If you’re installing over concrete, make sure it’s clean and dry. On wood subfloors, remove old staples or nails from previous floors, and secure any squeaky areas.
2. Acclimation
Let your planks sit in the room for 48 hours before installation. Temperature and humidity can affect the vinyl, and acclimating prevents expansion issues later. I’ve seen jobs where skipping this step caused buckling within a week.
3. Choose Your Method
There are three main types of LVP installation:
- Click-Lock (Floating Floor): The most popular DIY option. Planks click together without adhesive and “float” above the subfloor.
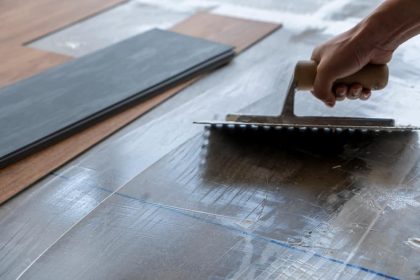
- Glue-Down: Ideal for commercial spaces or large rooms. Adhesive is troweled onto the subfloor, and the planks are laid in.
- Loose Lay: Thicker, heavier planks with a rubber backing that grips the floor. Great for small areas or quick projects.
4. Use Spacers for Expansion Gaps
Leave a ¼” gap around the room perimeter to allow for natural expansion and contraction. Use spacers to keep this gap consistent.
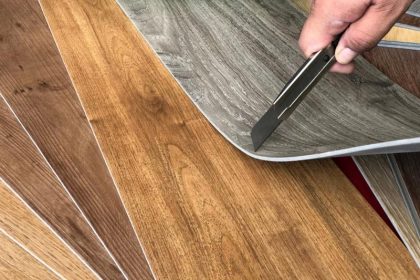
5. Cutting & Fitting
Use a utility knife for thinner planks or a vinyl cutter for thicker SPC/WPC styles. Score the surface, snap it, and you’re good to go.
If you’re installing around obstacles—like door jambs—undercut them so the planks slide underneath for a cleaner finish.
Need a detailed walkthrough? This vinyl plank installation guide has everything you need to know.
Common Rooms Where LVP Works Best
LVP’s water resistance and durability make it a go-to choice for nearly every room in the house. Based on real installs I’ve done, here’s where it really shines:
- Kitchens
Spills, dropped pots, and high foot traffic—kitchens are tough on floors. LVP handles it all without needing the careful upkeep of wood or the cold feel of tile. - Bathrooms
Thanks to its waterproof nature, especially in SPC form, LVP is a strong alternative to ceramic tile. Just remember to seal around edges or baseboards with silicone caulk to prevent water from seeping underneath. - Basements
If moisture or flooding is a concern, LVP with an SPC core is one of your safest bets. Pair it with a moisture barrier underlayment if your basement floor is concrete. - Laundry Rooms
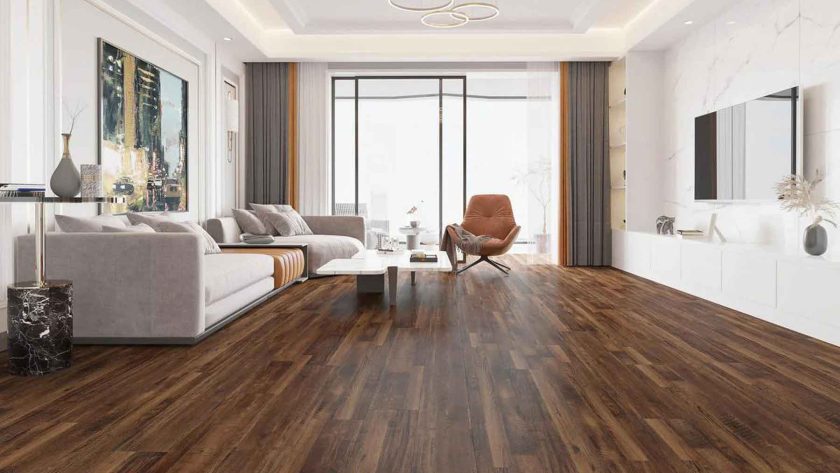
Between leaks, detergent spills, and vibration from appliances, laundry rooms are flooring battlegrounds. I’ve installed LVP in dozens of laundry spaces and rarely get callbacks. - Living Rooms & Bedrooms
In these cozy spaces, WPC LVP with attached padding adds warmth and quiet underfoot. You also get design flexibility, with options that mimic rustic wood, modern greys, or warm oaks. - Entryways & Mudrooms
LVP holds up well to wet shoes, mud, and sand—especially when paired with area rugs or mats to catch grit.
No matter the room, LVP provides a balance of practicality and beauty that fits modern lifestyles.
Is LVP Better Than Laminate or Hardwood?
If you’ve been comparing flooring options, this is likely the big question on your mind. I’ve helped countless clients weigh these choices, and here’s how LVP stacks up—based on real-life performance, not just manufacturer claims.
LVP vs. Laminate
While laminate flooring has improved over the years, LVP still comes out ahead in several key areas:
- Moisture Resistance: Laminate is made with high-density fiberboard, which absorbs water like a sponge. Even a small leak or wet mop can cause swelling. LVP, especially with an SPC core, is fully waterproof. I’ve had clients mop their LVP daily in kitchens without a single issue.
- Durability: Both laminate and LVP have protective wear layers, but LVP tends to hold up better against dents and chips. Laminate can chip at the edges with heavy impact—something I’ve seen happen frequently near doorways.
- Sound & Feel: Laminate often has a hollow or clicky sound when walked on, especially without underlayment. LVP feels more solid, especially with built-in padding or an additional underlayment.
- Installation Flexibility: LVP can be installed in kitchens, bathrooms, and basements—areas where laminate isn’t recommended. That gives you more design consistency across the home.
Bottom line: If you need waterproofing, want something quieter underfoot, and are worried about long-term maintenance, LVP is the better all-around choice.
LVP vs. Hardwood
Now, comparing LVP to hardwood is more nuanced—it depends on your priorities.
- Aesthetics: There’s no denying the timeless beauty and prestige of real hardwood. You can refinish it, and it can last generations. However, high-end LVP can come shockingly close to mimicking the look and texture of natural wood.
- Cost: Hardwood typically runs $6–$15 per square foot, plus installation. LVP costs a fraction—$2–$5 per square foot, and many homeowners install it themselves.
- Maintenance: LVP wins here. You don’t need to worry about refinishing, scratches, humidity changes, or water spills. Hardwood, while stunning, is more delicate and requires ongoing care.
- Durability: LVP handles heavy foot traffic, kids, pets, and spills without a fuss. Hardwood is more prone to dents, scratches, and water damage unless it’s engineered and well-sealed.
- Resale Value: Hardwood can add more value to a home and is often preferred by buyers. That said, if you’re not selling anytime soon and want practical beauty, LVP offers excellent ROI for your comfort and budget.
Final Thoughts from the Job Site
After more than 10 years working in homes from Florida humidity to Colorado winters, I’ve installed just about every flooring material available. And I’ll say this: LVP is one of the most versatile, forgiving, and homeowner-friendly options out there.
It gives you the upscale look of real wood or tile without the high cost, upkeep, or worry about water damage. Whether you’ve got pets, kids, or just a busy household, LVP handles life’s daily messes with grace.
Here are a few quick tips to wrap up:
- Pick the right wear layer: At least 12 mil for light to medium traffic; 20 mil+ if you’ve got large dogs or want commercial-level durability.
- Choose SPC for bathrooms and basements: It’s rock-solid, waterproof, and great for uneven subfloors.
- Stick with reputable brands: Shaw, COREtec, Karndean, and Mannington are just a few that consistently perform well.
- Check warranties: Look for a 15–25 year residential warranty at minimum. Some even offer lifetime coverage for wear and waterproofing.
Whether you’re refreshing a rental property, remodeling your forever home, or just need a quick upgrade that won’t break the bank, LVP is worth serious consideration.
If you’re curious how to start your LVP project—or want to know which thickness is best for your home—check out these step-by-step guides I’ve written based on real installs:
- Vinyl Flooring Installation: Your Easy Step-by-Step Guide
- Vinyl Plank Flooring vs Laminate: Pros, Cons, and Comparison
Got a question about your subfloor or whether click-lock or glue-down is better? I’m happy to walk you through it. You deserve floors that last—and feel good underfoot every day.