Vinyl plank flooring is one of the most popular choices in homes today—and for good reason. It’s sleek, durable, water-resistant, and a dream for busy households. But even though it’s considered low-maintenance, it still needs regular care to keep that fresh, like-new look.
If you’re wondering how to clean vinyl plank flooring without causing damage, you’re in the right place. This guide will show you exactly what to use, what to avoid, and how to clean smarter—not harder. From daily dusting to deep cleaning and stain removal, we’ll walk you through each step using safe, simple, and affordable methods.
Whether you’ve just installed luxury vinyl or have had it for years, these expert-backed tips will help you protect your floors, boost their shine, and extend their life—without the guesswork.
Why Cleaning Vinyl Floors the Right Way Matters

Vinyl plank flooring has a durable wear layer that resists scratches, stains, and water—but it’s not indestructible. Over time, even small particles like dust and sand can act like grit under your feet, dulling the finish and creating micro-scratches. This damage isn’t always visible right away but slowly erodes the glossy topcoat that gives vinyl its sleek look and water protection.
Using the wrong cleaning products can make things worse. For instance, bleach and ammonia break down the polyurethane wear layer, causing fading and discolouration. Abrasive tools like stiff brushes or scouring pads can also scratch or cloud the surface. That’s why a gentle, consistent cleaning routine is so important—it preserves both the appearance and the integrity of the material.
According to the North American Laminate Flooring Association (NALFA), using certified pH-neutral cleaners and soft cleaning tools extends the lifespan of resilient flooring products like vinyl planks.
What You’ll Need

Having the right tools and products on hand makes cleaning easier and safer for your floors. Here’s a deeper look at why each item matters:
- Microfibre mop: These are gentle on vinyl surfaces and trap dust effectively without scratching. Look for a flat-head mop that’s easy to wring out.
- pH-neutral cleaner or vinegar solution: Cleaners with a neutral pH don’t erode the protective coating or leave streaks. White vinegar is a safe, natural option for regular mopping.
- Soft bristle broom or vacuum with hard floor mode: Avoid beater bars—they can gouge the surface. A broom with flexible bristles is ideal for sweeping out dust and debris from plank edges.
- Dry mop: Ideal for picking up lint, pet hair, or fine dust daily, especially in busy households or during allergy season.
- Bucket and warm water: Make sure water is warm, not hot. Hot water may soften the adhesive beneath the planks or warp their shape.
- Non-abrasive scrub pad: Great for gentle spot-cleaning. Avoid anything rough or metallic.
- Clean cloth or towel: Essential for drying and buffing to prevent water spots or slip risks.
Avoid steam mops—even if labeled “safe for vinyl.” Excess heat and moisture can seep into the click joints or adhesive seams and cause lifting or warping over time.
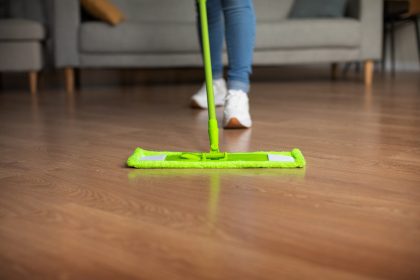
Step 1: Sweep or Vacuum Often

One of the easiest ways to protect vinyl plank flooring is to prevent dirt buildup. It might not look harmful, but grit from shoes, pet paws, or even open windows acts like sandpaper underfoot. Over time, this wears down the finish and creates dull spots or fine scratches—especially in high-traffic zones like hallways and kitchens.
That’s why regular sweeping or vacuuming is a must. A soft bristle broom helps collect larger debris without damaging the floor. If you use a vacuum, make sure it’s designed for hard surfaces—turn off the beater bar or rotating brush if your model has one. These attachments are great for carpets but too aggressive for vinyl.
Tip: Sweep in the direction of the planks. It helps clear out dust that settles in the seams.
For homes with pets or kids, a daily dry mop is a game changer. It glides smoothly over the surface and picks up fine particles like pet dander, hair, or lint that a broom may miss. Swiffer-style mops or reusable microfibre pads work well for this.
If you live in a dusty climate or near construction, you may need to sweep more frequently. Placing doormats at entryways and removing shoes indoors can also reduce how much dirt enters your home.
Step 2: Mix a Safe Cleaning Solution
When it comes to mopping vinyl plank flooring, the cleaning solution you use can make or break its appearance. Harsh chemicals may clean fast, but they often strip away the floor’s protective layer, leaving behind a dull finish—or worse, causing discolouration. That’s why it’s important to stick with pH-neutral cleaners made specifically for vinyl or use a gentle homemade alternative.
What’s a pH-Neutral Cleaner?

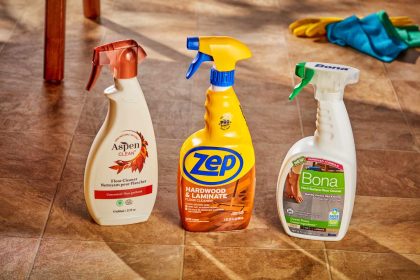
These cleaners fall around 7 on the pH scale—neither acidic nor alkaline. They break down grime without reacting chemically with the vinyl’s topcoat. Popular pH-neutral brands like Bona or Zep Neutral Floor Cleaner are designed for resilient surfaces and leave no residue behind.
If you prefer a natural option, a vinegar solution works just as well for light cleaning. Mix 1 part white vinegar to 3 parts warm water in a bucket. This combo lifts dirt, breaks down mild buildup, and helps deodorize without damaging the surface. For a touch of freshness, you can add a few drops of essential oil (like lemon or lavender)—just make sure it’s diluted properly.
What to Avoid

Skip products with bleach, ammonia, or solvents. These may create white spots, break down adhesives under floating floors, or even void your manufacturer warranty. Also, don’t use anything with added polish or wax—it can cause buildup and make your floors slippery.
Pro tip: Before using any new product—even a vinegar solution—test it in a corner or behind furniture. If the floor dries evenly without streaks or haze, you’re good to go.
Not sure which product to use? Before you buy, check out our picks for the best cleaners made specifically for vinyl plank floors—tested for safety, shine, and no residue.
Step 3: Mop with Just Enough Water

Vinyl plank flooring is water-resistant—but that doesn’t mean it likes being soaked. In fact, too much water is one of the quickest ways to damage it. If liquid seeps into the edges or between the seams, it can loosen adhesive, cause the planks to swell, or lead to mold beneath the surface. That’s why the damp mop method is your best bet.
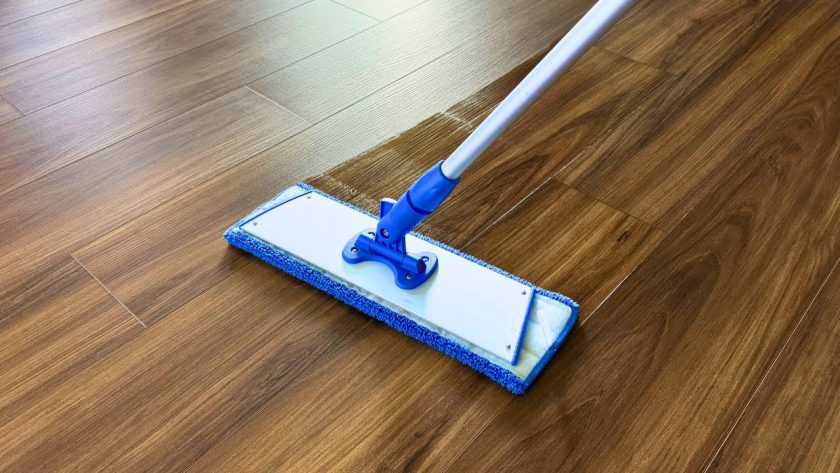
How to Mop the Right Way
- Dip and Wring Well: Soak your microfibre mop in the cleaning solution, then wring it out thoroughly. The mop should be just damp—not dripping.
- Work in Small Sections: Mop in sections of 3×3 feet, starting from the far corner and working your way back to the door. This prevents you from stepping on clean, wet areas.
- Follow the Grain: Mop along the direction of the planks. This helps lift dirt from grooves and prevents streaking.
- Rinse Often: If your mop pad gets too dirty or saturated, rinse it in clean water and wring it out again. Switching to a fresh pad halfway through larger rooms is a good habit.
Microfibre mops are ideal here—they’re absorbent, reusable, and don’t leave lint. They also glide easily across the floor without dragging moisture into the plank seams.
Why This Method Works
Using minimal water prevents warping and keeps the floor’s structure intact. It also reduces the chance of leaving cloudy streaks from soap residue. If you notice haziness after mopping, it could be from too much cleaner—rinse with plain water and dry with a clean towel.
Want to take it a step further? Use two buckets: one for the cleaning solution and one for rinsing your mop. It keeps dirty water out of the mix and makes your final result cleaner and brighter.
Step 4: Spot-Clean Stains Gently

Life happens—kids drop juice, pets track in mud, or a crayon mysteriously ends up on the kitchen floor. Vinyl plank flooring is forgiving, but spot stains still need special care. The good news? Most marks come off easily with the right technique and a bit of patience.
General Stain-Removing Steps
- Act Fast: The sooner you catch the stain, the easier it is to remove. Dried spills can become sticky or harder to lift.
- Use a Soft Cloth or Non-Abrasive Pad: Gently wipe the spot using circular motions. Avoid steel wool or anything rough—it can scratch the finish.
- Apply Cleaner Directly to the Stain: Use your pH-neutral solution or vinegar mix sparingly. For sticky messes like jam or soda, a damp cloth usually does the trick.
What to Use for Specific Stains
- Food & Drink Spills: Wipe up with a damp cloth. For stubborn spots, apply a bit of diluted cleaner and gently scrub.
- Oil-Based Stains (makeup, crayons, greasy foods): Add a drop of mild dish soap to your vinegar solution. It breaks down the oil without harming the finish.
- Ink or Marker: Try rubbing alcohol on a cotton pad, but only in tiny amounts and always test in a hidden area first.
- Scuff Marks: A white rubber eraser or tennis ball works surprisingly well to buff them away without cleaning products.
What If It Still Won’t Budge?
If a stain resists gentle methods, let a damp cloth soaked in your solution sit over it for a few minutes to soften the residue. Then gently wipe away—no scrubbing required.
Dealing with paint drips or splatter from a recent DIY project? Here’s exactly how to get paint off vinyl floor without damaging the surface.
Step 5: Dry the Floor Completely

After you’ve mopped or spot-cleaned your vinyl plank flooring, it’s tempting to let it air-dry and call it a day. But don’t skip this step—drying is essential to protect your floors and avoid problems like streaking, slipping, or even water damage in the long run.
Why Drying Matters
Vinyl plank floors are water-resistant, but they’re not waterproof at the seams. Standing water, even in small amounts, can sneak into the tiny gaps where planks meet—especially around click-lock edges or near walls. Over time, this trapped moisture can weaken adhesive bonds or encourage mildew beneath the surface.
Plus, drying your floor brings out the shine, especially on high-gloss luxury vinyl plank options. If you’ve noticed a dull or streaky finish after mopping, it may be due to leftover residue or excess water left behind.
How to Dry a Floor Quickly
- Use a Clean Microfibre Cloth or Towel: Gently buff the surface after mopping to soak up moisture and bring back the shine.
- Speed Up Air Drying: Open windows, turn on a ceiling fan, or place a standing fan in the room to circulate air and help floors dry faster.
- Walk Carefully Until Fully Dry: Vinyl flooring can be slippery when wet, especially in smooth-finish styles, so keep pets and kids off the floor until it’s completely dry.
Bonus Tip
If you’re deep cleaning or spot-treating larger areas, try working in sections. Clean, then dry one area before moving to the next. This way, no spot stays wet for too long, and you get better results across the whole floor.
Tips to Maintain Vinyl Floors Long-Term
Vinyl plank flooring is built to handle daily life, but like anything in your home, it performs better when you care for it right. A little effort goes a long way when it comes to keeping it looking fresh, smooth, and damage-free. Here’s how to make sure your floors stay in top shape year after year:
1. Use Floor Protectors Under Furniture
Chair legs, sofa feet, and even plant stands can leave pressure marks or scratches—especially if they’re dragged or bumped often. Attach felt pads or rubber protectors to the bottom of furniture to soften the contact. For rolling chairs or stools, consider using a hard floor mat to prevent scuffs.
Real-world note: A The Rouse Homes client with two kids and a wheeled desk chair noticed small wear rings on her vinyl floor within a few months. Swapping the chair wheels for rubber ones and using a clear protector mat solved the problem without affecting her room’s look.
2. Place Doormats at Entrances
Dirt, gravel, and moisture from shoes are the #1 cause of micro-scratches and finish dullness. Lay a good-quality doormat outside and inside each entry door. For extra peace of mind, use a no-shoes policy in the house to keep gritty messes outside where they belong.
3. Sweep Daily, Mop Weekly
This basic routine makes a big difference. Sweeping or using a dry mop each day helps prevent tiny debris from turning into floor scratches. Weekly mopping clears off built-up dust and keeps the surface looking fresh. If your home has pets or kids, you might mop more often—just keep it gentle and consistent.
4. Avoid Dragging Heavy Items
Dragging large items—like a couch or heavy cabinet—can catch on seams or dig into the surface. Always lift and carry or use moving sliders. If lifting isn’t possible, place a soft rug or folded towel underneath before shifting furniture.
5. Follow Manufacturer Guidelines
Each flooring brand has its own care and cleaning recommendations based on the materials and coatings used. Check the care guide that came with your floor or visit the manufacturer’s website. Using unapproved cleaners or tools could void your warranty.
Tip: Snap a photo of your product’s care tag or keep the manual in a drawer for quick reference later.
Deep Cleaning Vinyl Plank Flooring
Even if you sweep and mop regularly, every few months your vinyl flooring needs a deeper clean to remove hidden grime, built-up residue, or stubborn scuff marks—especially in high-use areas like the kitchen, hallway, or entryway.
When Should You Deep Clean?
- Every 2 to 3 months in a normal household
- Monthly if you have pets, kids, or live in a dusty or humid climate
- After a renovation, indoor project, or seasonal shift
Step-by-Step Deep Cleaning Routine
- Vacuum First: Start by vacuuming the entire floor (using the hard floor setting) to lift away surface dust, crumbs, and loose dirt. This prevents debris from getting pushed around during mopping.
- Choose the Right Cleaner: For deep cleaning, use a stronger—but still vinyl-safe—cleaner like Zep’s Neutral Floor Cleaner or Rejuvenate Luxury Vinyl Floor Cleaner. These are made to break down stuck-on dirt and restore shine without damaging the top layer.Prefer DIY? You can use the vinegar mix (1 cup vinegar to 3 litres warm water), but skip essential oils this time. Focus on cleaning power.
- Mop in Sections: Use a fresh microfibre pad and damp mop in small zones, following the grain of the vinyl. Don’t rush—let the cleaner sit on the floor briefly before wiping if needed.
- Rinse With Plain Water: After mopping with cleaner, repeat the process with clean water. This final rinse removes any remaining solution and helps prevent dullness or film buildup.
- Dry Completely: Buff with a clean towel or let air dry with fans or open windows. Your floor should feel smooth and residue-free under bare feet.
Extra Tip: Tackle Trouble Spots
If you notice specific areas still looking grimy (under the dining table or near doorways), reapply your solution with a cloth or soft scrub pad and wipe again. Don’t apply too much pressure—let the cleaner do the work.
DIY Cleaning Solutions That Work
You don’t always need a store-bought cleaner to keep your vinyl plank floors looking spotless. In fact, some of the best solutions are already in your kitchen. DIY cleaners can be just as effective—when used correctly—and they’re budget-friendly, gentle on flooring, and better for homes with kids or pets.
Why DIY Solutions Are Safe for Vinyl
Vinyl’s protective top layer is sensitive to acids, alkalis, and residues. Many commercial cleaners contain additives, fragrances, or degreasers that leave behind streaks or buildup. DIY formulas let you control the ingredients, reduce exposure to harsh chemicals, and still get a sparkling result.
All-Purpose Vinegar Cleaner (Everyday Use)
What You’ll Need:
- 1 cup of white vinegar
- 3 litres of warm (not hot) water
- Optional: 3–5 drops of essential oil (like lavender or lemon)
How to Use:
Mix the ingredients in a mop bucket. Dip a microfibre mop in, wring it out well, and clean in small sections. Rinse your mop as needed.
Good For:
- Daily or weekly mopping
- Removing light dirt, footprints, and everyday messes
- Households with children or pets
Not Ideal For:
Tough stains or oil-based spills—it lacks degreasing power.
Mild Soap Cleaner (Great for Oily Spills)
What You’ll Need:
- 2 teaspoons of mild dish soap (like Seventh Generation or Dawn Free & Clear)
- 3 litres of warm water
How to Use:
Mix the soap and water in a bucket. Use a damp mop—not soaked—and clean gently. Follow with a second mop using plain water to rinse off soap residue.
Good For:
- Greasy kitchen messes
- Makeup, crayon, or oily food spills
- Vinyl flooring with a matte or textured finish
Pro Tip: Always rinse soapy cleaners to avoid cloudy residue buildup.
When Not to Use DIY Mixes
Avoid recipes that suggest:
- Baking soda (abrasive)
- Lemon juice or vinegar in high concentrations (too acidic)
- Hydrogen peroxide (can cause fading on dark vinyl)
Reminder: Even natural ingredients can damage vinyl if overused. Stick to balanced mixes and never pour solutions directly onto the floor—always apply with a mop or cloth.
Avoid These Common Mistakes
Vinyl plank flooring may be durable, but a few wrong moves can quickly wear down its protective topcoat, cause warping, or leave behind permanent dullness. Here’s what to watch out for—and what to do instead.
1. Don’t Use Abrasive Scrubbers
Steel wool, stiff brushes, or scouring pads might remove a sticky mess quickly, but they’ll also scratch the wear layer. Even one rough scrub can leave visible marks that dull the surface and trap dirt.
What to use instead: A non-abrasive scrub pad or microfibre cloth. Always apply gentle pressure in circular motions.
2. Skip Wax-Based Products
Modern vinyl planks have a built-in finish designed to resist wear and offer a natural shine. Waxing them not only builds up sticky residue but can also make your floor dangerously slippery.
Better option: If you want extra shine, use a manufacturer-approved vinyl polish or simply maintain a clean, dry floor. Dullness is often caused by product buildup—not lack of wax.
3. Never Pour Water Directly on the Floor
Flooding the floor with water during mopping or using wet string mops can cause moisture to seep into seams and corners. Over time, this leads to swelling, edge curling, and adhesive breakdown—especially in floating floors.
What to do instead: Always use the damp mop method—wring out excess liquid before applying it to the surface.
4. Avoid Strong Chemicals
Bleach, ammonia, acetone, and harsh degreasers may be powerful, but they’re too intense for vinyl. They can strip away protective coatings, fade colours, and leave your floor brittle or blotchy.
Stick to: pH-neutral vinyl floor cleaners or mild DIY solutions. When in doubt, check your floor manufacturer’s website for approved products.
A Quick Story: Real Results with Gentle Cleaning
Last spring, my friend Mira reached out in a bit of a panic. She had just installed gorgeous grey-toned vinyl plank flooring in her open-plan kitchen and living space. A few weeks in, though, she noticed streaks every time she mopped and dull patches forming near her breakfast bar. Her toddlers were constantly scooting their chairs back and forth, and the floor had lost that fresh, new-floor glow.
She had been using a multipurpose spray cleaner—one that promised to work “on everything”—and a regular sponge mop. It wasn’t cutting it. Not only was it leaving behind streaks, but the mop was also holding too much water and pushing it into the seams.
We swapped her cleaning routine for something much simpler: a microfibre flat mop, a pH-neutral vinyl floor cleaner, and a few felt pads under those toddler chairs.
After her first proper cleaning session, she texted me:
“It’s like I got a new floor again. The shine is back and no more stickiness!”
And just like that, the house felt fresher—and safer too. Her kids could run barefoot without slipping, and the surface felt smooth underfoot. It was a reminder that with vinyl plank flooring, less is more. No harsh products, no soaking. Just the right tools and a bit of care made all the difference.
Final Thoughts
Caring for vinyl plank flooring doesn’t require expensive products, complicated routines, or constant effort. It just takes the right approach—and a little consistency. The good news? Once you understand how to clean vinyl plank flooring properly, it becomes second nature.
The key is being gentle. Use soft tools, safe cleaners, and minimal moisture. Clean regularly, treat spills quickly, and avoid the shortcuts that can do more harm than good. Whether it’s a quick daily sweep or a seasonal deep clean, your floors will reward you by staying smooth, shiny, and inviting for years to come.
And remember—don’t wait for visible dirt to act. Most wear and tear on vinyl happens gradually, from everyday grit and standing moisture. By staying ahead of the mess, you’re not just cleaning—you’re preserving the beauty and life of your floors.
At The Rouse Homes, we believe every home should feel as good as it looks. With just a few simple habits, your vinyl flooring can stay the kind of surface you’ll be proud to walk on—barefoot, coffee in hand, sunshine pouring through the window.
Thinking of installing new floors or upgrading a room? Don’t miss our full vinyl installation guide—it’s designed to help you get pro results, even as a beginner.
Frequently Asked Questions
What is the best thing to use to clean vinyl plank flooring?
Use a pH-neutral floor cleaner or a homemade vinegar-and-water solution (1:3 ratio). These are safe, effective, and won’t damage the floor’s protective top layer.
Can you mop vinyl plank flooring with water?
Yes—but only if you use a damp mop, not a wet one. Excess water can seep into seams and cause damage over time.
Will vinegar damage vinyl plank flooring?
No. When properly diluted, white vinegar is safe and effective for routine cleaning. Just avoid using it undiluted or mixed with baking soda or lemon juice.
What should you not use on vinyl plank flooring?
Avoid abrasive scrubbers, steam mops, waxes, ammonia, and bleach-based cleaners. These can scratch, discolor, or strip the protective wear layer.
How often should vinyl plank flooring be cleaned?
Sweep or dry mop daily to remove debris. Mop weekly using a safe cleaner. Deep clean every 2–3 months depending on foot traffic.