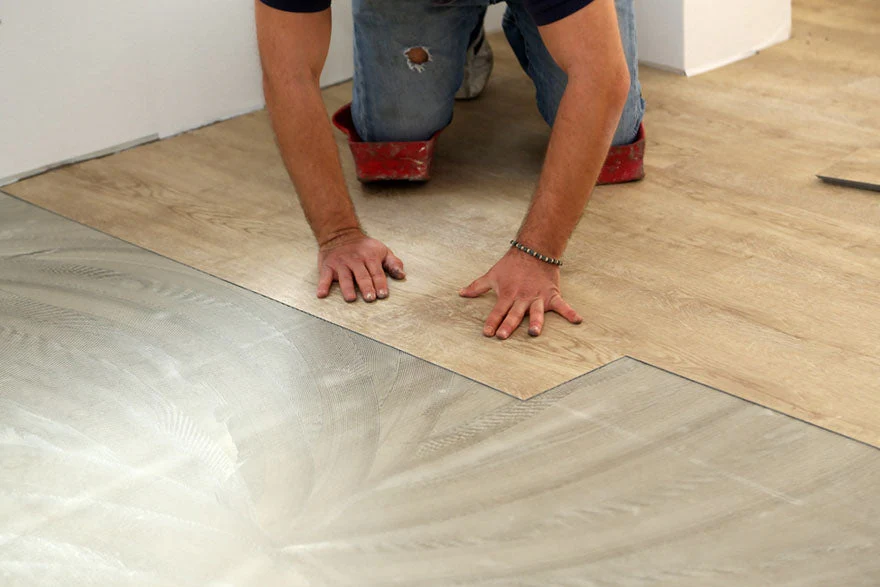
Vinyl plank flooring is a favourite among homeowners and renovators for its affordability, stylish appearance, and ease of installation. It’s a great DIY option—but even the simplest jobs can go wrong if you’re not careful. In this guide, we’ll cover the top 10 common mistakes when installing vinyl plank flooring, along with practical tips to help you avoid them.
Whether you’re laying vinyl over concrete, tile, or plywood, understanding the most frequent errors can save you time, money, and a lot of frustration.
1. Skipping Proper Subfloor Preparation
One of the biggest vinyl plank flooring installation errors is laying planks on an uneven or dirty subfloor. Vinyl may seem forgiving, but imperfections underneath will show over time—either as bumps or unstable flooring.
Tip:
Sweep, vacuum, and repair your subfloor before installation. Whether it’s concrete, tile, or wood, the surface should be clean, dry, and level. Any debris can affect the adhesive or create soft spots under foot.
2. Forgetting to Acclimate the Flooring
A common oversight in DIY projects is skipping the acclimation period. Vinyl planks need to adjust to the room’s temperature and humidity before installation. Ignoring this step can lead to planks expanding or contracting after they’re installed—causing gaps or buckling.
Tip:
Let the planks sit in the installation room for at least 48 hours before starting. This helps them settle and reduces future movement.
3. Not Using a Moisture Barrier on Concrete
If you’re installing vinyl over concrete, one of the worst vinyl flooring installation problems is neglecting to use a moisture barrier. Concrete subfloors can release moisture over time, which may seep into the planks and damage them.
Tip:
Install a vapour barrier or underlayment designed for concrete subfloors. It protects your flooring and ensures it stays intact for years.
4. Ignoring Expansion Gaps
Vinyl planks expand and contract with changes in temperature. Failing to leave an expansion gap around the edges of the room is one of the most common causes of warping and buckling.
Tip:
Leave a 1/4-inch gap between the wall and the flooring edges. Use spacers during installation to maintain a consistent distance. You can cover the gaps later with transition strips or skirting boards.
5. Using the Wrong Underlayment
Not all vinyl planks require underlayment, but if your product does and you skip it—or choose the wrong one—you may experience noise, poor insulation, or floor movement.
Tip:
Always follow your flooring manufacturer guidelines. Some planks come with built-in padding, while others need separate underlayment to improve soundproofing and comfort.
6. Incorrect Plank Staggering
Improper plank staggering not only looks unprofessional but can also weaken the structure of the floor. Repeating patterns or aligning seams too closely can create weak points.
Tip:
Stagger the seams by at least 6 inches between rows. This provides a more natural look and distributes stress evenly across the floor.
7. Overlooking Floor Leveling
Installing over an uneven floor can cause planks to separate, click-lock systems to fail, or adhesive to break down. Uneven subfloors also lead to noisy or bouncy sections.
Tip:
Use a levelling compound on low spots and sand down high spots before installing. For floating floors, a perfectly flat surface ensures the click-lock system performs correctly.
8. Misusing Adhesives
If you’re working with glue-down vinyl plank flooring, using too much or the wrong flooring adhesive can lead to issues like bubbling or slipping.
Tip:
Follow the adhesive manufacturer’s instructions closely. Use a notched trowel for even application and allow proper drying time before walking on the floor.
9. Cutting Planks Incorrectly
Accurate edge trimming is key for a seamless finish. Poor cutting can result in gaps at the walls or misaligned rows.
Tip:
Use a utility knife or a vinyl cutter for clean cuts. Measure twice before cutting, especially around doorways and corners where precision matters most.
10. Skipping Final Inspection and Finishing Touches
Once the planks are down, many DIYers rush the process and forget to check for loose ends, uneven gaps, or floating pieces. This can compromise the look and function of your new floor.
Tip:
Walk across the entire floor to check for soft spots or misaligned joints. Add transition strips between rooms and make sure all perimeter gaps are covered. This final inspection ensures a solid, professional result.
Bonus Tips for a Smooth Installation
Here are a few additional tips to keep your vinyl plank flooring installation guide error-free:
- Read the product manual carefully before starting.
- Make a cutting plan before beginning your first row.
- Always install planks in the same direction as the room’s main light source for the most natural look.
- Clean the subfloor with a damp mop before starting to reduce dust and debris.
- Keep your tools handy—tape measure, spacers, rubber mallet, and tapping block.
A Real Example: Learning the Hard Way
A friend recently tried laying vinyl plank flooring over existing tile in her hallway. She skipped the subfloor preparation and didn’t level a few slightly raised tiles. Within a month, the planks started clicking underfoot and developed visible high spots. After some patching and proper underlayment, she had to reinstall most of the floor—something that could’ve been avoided with better prep.
Wrapping Up
Avoiding these common mistakes when installing vinyl plank flooring is all about planning, patience, and preparation. Whether you’re placing planks over plywood, tile, concrete, or another existing floor, the same rules apply—start with a smooth surface, allow for expansion, and follow the proper techniques.
By staying aware of these vinyl plank flooring installation issues and following best practices, you can enjoy a stunning, durable floor that holds up beautifully for years to come.


