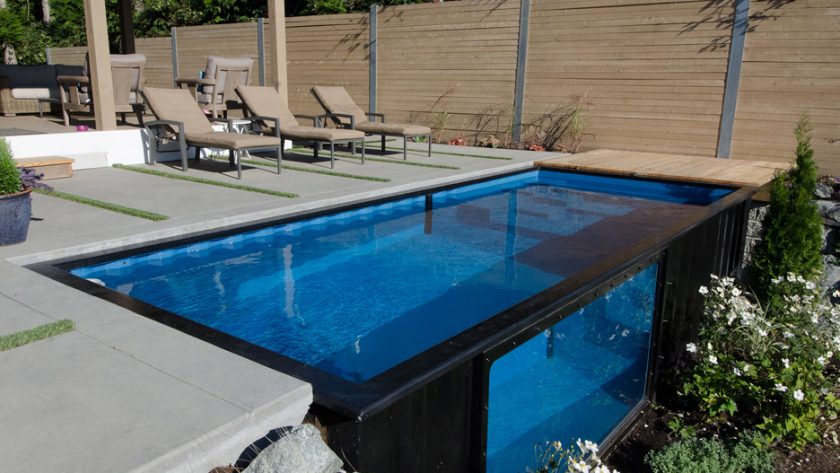
Hey there, aquatic aficionados and DIY enthusiasts! If you’re all about making a splash and want to add a unique touch to your backyard, we’ve got an idea that’s both innovative and refreshing. Ever considered turning a regular shipping container into your very own swimming pool? Yep, you read that right! Get ready to soak up some inspiration as we take you through the steps of turning a shipping container into an amazing swimming pool.
Now, you might be thinking, “Hold on, isn’t a shipping container made of metal?” Well, you’re absolutely right! Those sturdy steel giants that travel the world’s oceans can serve as the foundation for your watery haven. So, let’s dive into the details of how you can transform a shipping container into a fantastic swimming pool right in your own backyard.
Step 1: Select Your Container
The first order of business is to track down a suitable shipping container. You know, those colossal boxes that are synonymous with international shipping? They come in various sizes, so pick one that suits your yard space and the pool size you have in mind. Once you’ve got your container sorted, it’s time to roll up your sleeves and get ready to embark on a creative adventure.
Step 2: Cut and Carve
Here’s where the real excitement begins! Armed with an angle grinder, you’ll be cutting out an opening in the container to form the pool’s entry point. Whether you opt for a small corner or go all out with a larger side opening, the choice is yours. This step is all about setting the stage for your aquatic masterpiece.
Step 3: Waterproofing and Protection
Steel and water might not be the best of friends, so it’s essential to seal the container properly to prevent leaks and rust. A pool liner or specialized coating will provide the protection your pool needs, ensuring it remains a sturdy and durable fixture in your backyard for years to come.
Step 4: Plumbing Magic
No pool is complete without proper plumbing! Connect your pool’s filtration and circulation systems to ensure the water remains clean and inviting. While plumbing might seem a bit intimidating, there’s a wealth of resources and helpful experts available to guide you through the process. Soon enough, you’ll be a plumbing pro!
Step 5: Unleash Your Creativity
Now comes the fun part – customization! Your container pool is a blank canvas, waiting for your personal touch. Add some vibrant tiles to the interior, create a wooden deck around it, or even set up a chic poolside lounge area. This is your chance to let your imagination run wild and turn your container pool into a true work of art.
Step 6: Dive In and Enjoy!
The moment has finally arrived – it’s time to fill your container pool with water. Flip the switches, adjust the temperature, and voilà! Your backyard has been transformed into a haven of relaxation and fun. Invite friends over for poolside gatherings, spend lazy afternoons lounging by the water, or take refreshing dips to beat the heat.
In conclusion, turning a shipping container into a swimming pool is more than just a DIY project – it’s an adventure that results in a unique and delightful addition to your home. From a simple steel container to a remarkable aquatic retreat, your backyard will become a hub of enjoyment and relaxation. So, grab your tools, unleash your creativity, and get ready to make a splash with your extraordinary container pool. Happy swimming, and remember to have your favorite poolside tunes on standby!


